Hi There!
Today I’m sharing the instructions for a project I designed for my October “Stamp’ Up! Product Based Class” featuring the Merry Medley stamp – a copper embossed luminary made of vellum. Everyone attending the class purchased the stamp and came along to make 4 projects. I really enjoy running these classes based around a particular stamp set as everyone gets to make a range of items using their new product.
As soon as I saw the Merry Medley Stamp I knew I wanted to make a luminary using it. And what a perfect project to showcase Stampin’ Up!’s stunning Copper Embossing Powder and Copper Foil Sheets!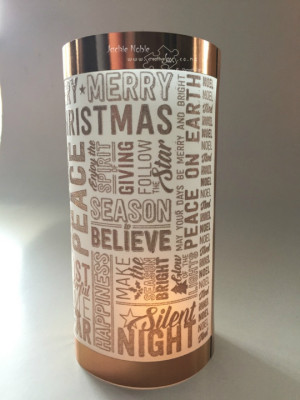
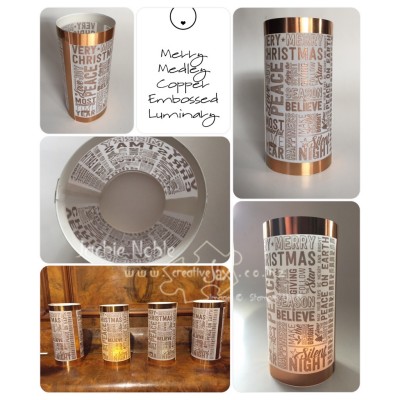
Before I give you the details of how to make the luminary – here’s the collage of the finished item that I shared on Facebook yesterday and which certainly generated such a lot of interest! Thanks so much for all the kind words and “Likes”. So pleased you all love it as much as I do!
Thanks so much for all the kind words and “Likes”. So pleased you all love it as much as I do!
- Ink Stamp with a dark colour – e.g. Momento Black ink.
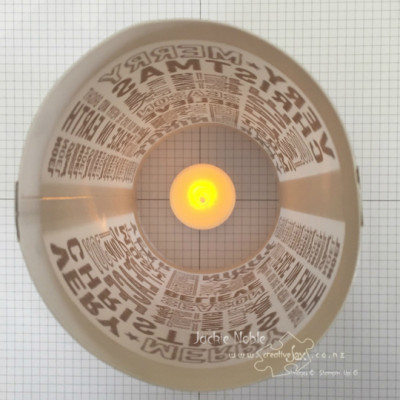
- Position stamp so that the left-hand edge and the bottom edge are running along the bold (dark) lines on the Grid paper. This image will be used as a guide for positioning the stamp when using Versamark. (below)
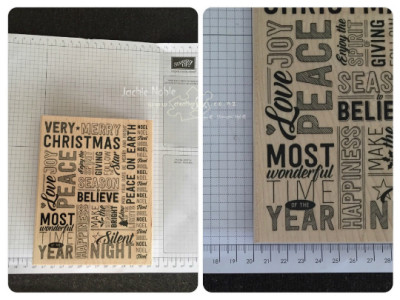
- Note: You could use a Stamp-a-ma-jig instead, but the stamp/block is very large and somewhat difficult to move easily. I found this method easier, especially in a class.
- Trim the vellum to 18cm (~ 7 1/2″) tall (when in Landscape) this will give approximately 2cm (~ 3/4″) above and below the final images on the luminary.
- There is also approximately 2cm (~ 3/4″) between the final embossed images.
- In relation to the edges of the black image, mark these measurements onto the Grid Paper. (below)
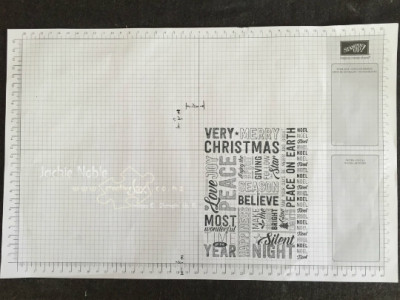
- Position the vellum over the black image – lining the outside edges to the marks on the grid paper. Tape the edges so the vellum paper doesn’t move. (below – left)
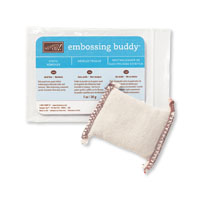
- Rub the Embossing Buddy over the vellum. (below – left)
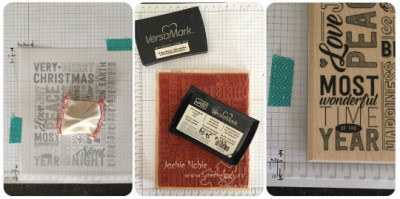
- Ink the stamp using Versamark ink. With a large stamp like this one, it is easiest to place the stamp facing upwards and bring the ink pad to the stamp. (above – middle)
- Position the stamp against the same bold/dark lines as used previously and stamp your image. (above right)
- Remove stamp and spread Copper Embossing powder over vellum. Put plenty on, and then pour off any excess. I give the paper a quick flick on the back to remove any extra. (below – left)
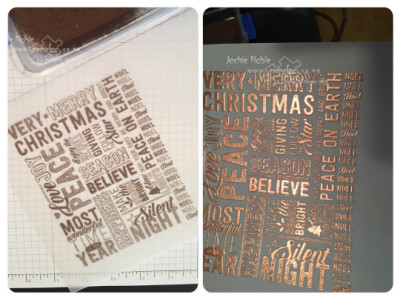
- Turn on the heat tool and make sure it is warmed up before pointing it at the vellum. If the tool is well heated before you start, the powder will melt quickly and there will be less chance of scorching and warping the vellum.
- Pointing the heat tool away from your body and fingers, heat the powder until it melts. When using a Stampin’ Up! heat tool, I have the end of the tool approximately 1-2 inch from the paper surface and aim it so the hot air is running along the paper, away from me. I can then move the tool as the powder melts.
- Check all the powder is thoroughly melted. (above – right)
- Reposition the vellum onto the grid paper so that there is approximately 2cm between the embossed image and the image on the grid paper, and there is 2cm above and below. (below – top left)
- Re-ink the stamp with Versamark, line the block edges up to the bold/darks lines on the grid paper again, and stamp. (below – top right & bottom left)
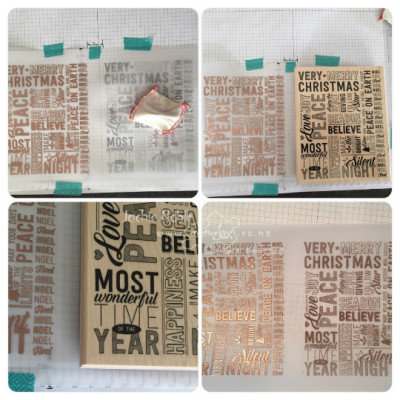
- Cover the new Versamark image with embossing powder and heat emboss as described earlier. (above – bottom right)
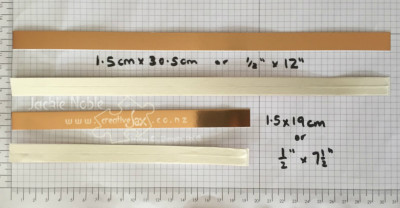
- Place Tear Tape Adhesive on the back of the Copper Foil Strips.(below)
- Trim the vellum to 1.3cm (1/2″) past the outside edge of the embossed image on the left and right edges.
- Place Tear Tape Adhesive along one edge. (below)
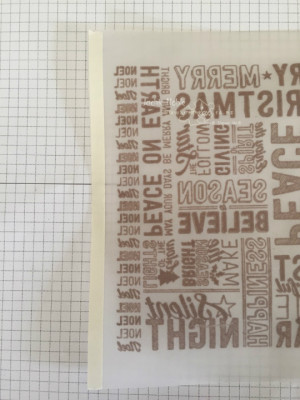
- Join the right and left sides of the vellum. (below – top left)
- Curl the longer pieces of copper foil using a bone folder. (below – top middle)
- Remove the adhesive backing and adhere the copper strip to the vellum – starting over the join and so that the top edges are aligned. (below – top right)
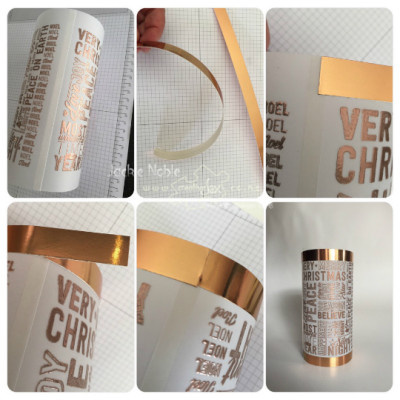
- Continue wrapping and adhering the copper foil strip to the vellum until it is completely encircled. There will be a little extra foil. Trim so that the edges butt up to each other but do not overlap – the join is too bulky if you overlap the edges. (above – bottom left and middle)
- Repeat at the other end of the luminary so that there is foil top and bottom. (above – bottom right)
- Remove backing from the tape on one of the shorter pieces of copper foil. Adhere to the vellum so that it covers the join. It will be slightly longer than the vellum. (below left)
- Trim off excess foil. (below middle)
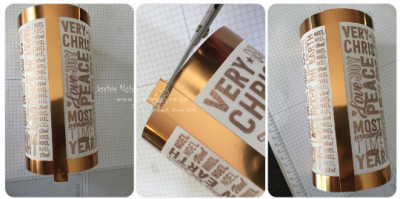
- Remove adhesive backing from the last copper foil strip and adhere to the vellum between the two embossed images. (above – right)
- The luminary is now finished!
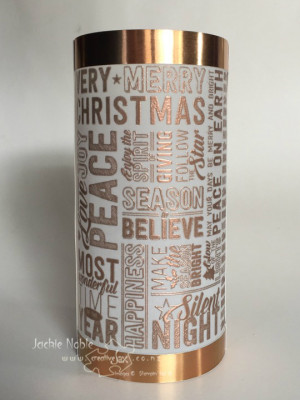
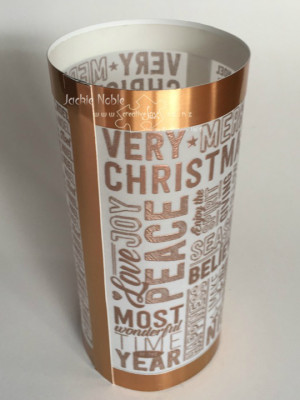
- Place the luminary over a battery operated tealight candle
Thanks for stopping by and if you’d like to see another project featuring the copper embossing powder check out this CASEing the Catty Post using the Best Birds Stamp set.
 Until next time
Jackie
Stampin’ Up! Promotions
I hope you enjoyed this post,
As always – if you wish to know anything more about info in this post, or to get a catalogue, or to buy any of the items mentioned in the post, please contact me.
Or you can shop 24/7 at my online Stampin’ Up! shop – just click on the shop now button at the Top Right of the page.
Please do use the hostess code to support creativeJax if you are ordering online! Entering the Hostess code combines the value of online orders – which assists me to offer events and thank you’s for my customers and support charities such as Ronald MacDonald House and local events where I donate product and/or classes.
The current Hostess Code can be found at the top right of my webpage.
If your order is over $300, please do not use this code as You become the hostess and get the Rewards!
If you would like to find out about joining my Stampin’ Up! Team (thINK Creative) – Please do get in touch – I would love to chat to you about that.
You can receive my Blog Posts directly by email or join my monthly Newsletter group – you can subscribe using the buttons at the right of my page.
Product List
|
|
|
|
|
|
|
|
|
|
|
|
|





5 comments
Skip to comment form
What a lovely project with easy to read and understand instructions and really clear photos you have produced here Jackie. Thanks for sharing it with us. Christine xx
A really clear tutorial, thank you.
Thank you so much for posting directions for this, it’s so pretty!!!
What a beautiful piece you’ve created! Thank you for sharing your creation with all of us!!
This is really gorgeous! Thank you for making a tutorial!