Stampin’ Up! – CTC Blog Hop – Sale-A-Bration

Hi All

Hello and welcome to this week’s CASEing the Catty Blog Hop.

This week we are taking our inspiration from the Sale-A-Bration catalogue.

12465768_10153777824802158_1363854616063678406_o

Whether you’re joining the Hop here, or if you’ve hopped on over from the lovely Elizabeth Grossa BIG hello!

Remember to click on through this week’s CTC crew to see plenty of inspirational projects that the crew have created for you – there’s a full list on the CTC blog page if you get lost along the way.

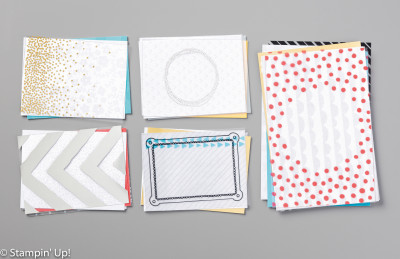
I am so pleased that one of the items you can earn FREE during Sale-A-Bration is a set of Project Life cards – the Memories in the Making Project Life Speciality Card Collection. It’s such a bright happy set of cards in a colour palette of Daffodil Delight, Tempting Turquoise, Watermelon Wonder, Basic Black, and white along with silver and gold.

US_AU_EU_16_SAB_Demo_Images-17

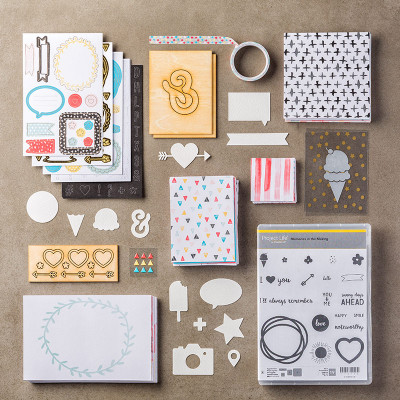
This Sale-A-Bration collection co-ordinates with the Memories in the Making Card Collection, stamp set and Accessory pack from the Annual Catalogue – shown below as a bundle which means a 15% savings compared to purchasing the three (3) items individually.

140575G

I’ve made a couple of greeting cards using of the cards from the Speciality Card Collection, but hadn’t done any memory keeping with them so decided that would be my project for this week’s Sale-A-Bration Blog Hop.

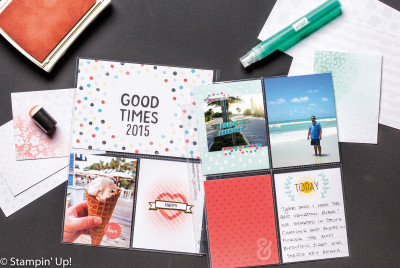
I’ve taken my inspiration from page 9 and CASE’d the double layout in the top picture.

US_AU_EU_16_SAB_Demo_Images-15

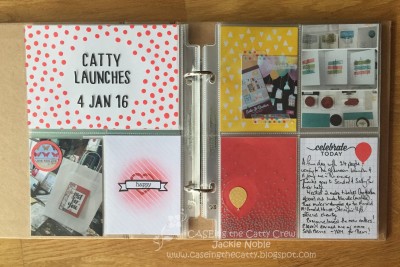
Here’s my layout.

IMG_0662

The layout is about the Catalogue Launch Parties I held last month when the new Occasions Catalogue and Sale-A-Bration started. I love a party and a new catalogue is a great reason to celebrate, so that’s what we did!

The Title card is using one of the 4 x 6″ overlays available in the Sale-A-Bration speciality collection. In the collection there are several coloured overlays like the one above, but also some that are gold on one side and silver on the other.

I have loaned my Memories in the Making stamp set to a friend so had to improvise – always an opportunity to be creative.

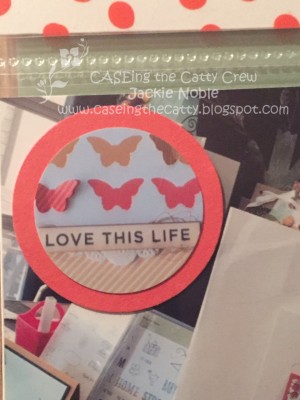
The bottom left 3×4″ pocket on page one has a cute little “Love” stamped, punched out and added as an embellishment. Instead –  I took a photo of one of the pages of the Enjoy the Little Things Clipboard Project Kit – printed, punched out and matted it. A perfect sentiment for how I feel about being a Stampin’ Up! demo!

IMG_0670

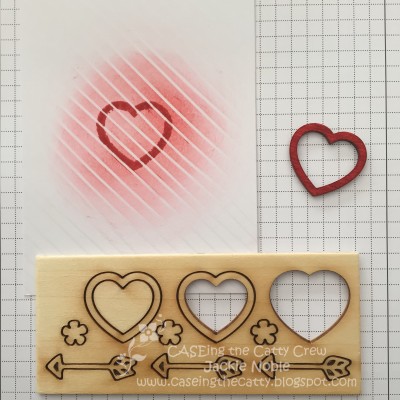
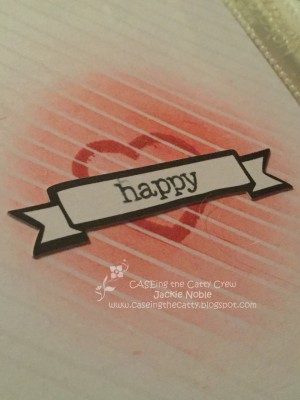
The 3×4″ that is in the bottom right hand pocket of page one has a Watermelon Wonder heart stamped over the sponged Watermelon Wonder area. This card is one of the UV  resist cards in the speciality card collection. you can add any colur to it – how flexible is that!

IMG_0668

In the absence of the stamp set I used on the wooden hearts from the Memories in the making Accessory Pack as shown below.

IMG_0663


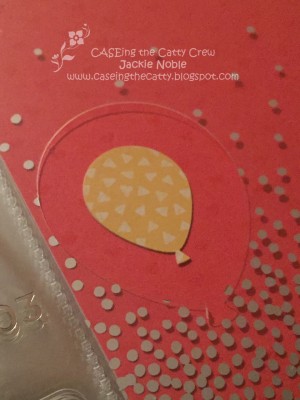
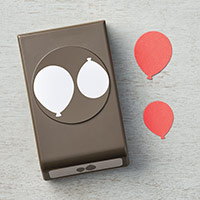
And rather than using an ampersand like the original – I chose to have balloons on the bottom left pocket on page two .First I punched out a balloon using the Balloon Boutique Punch before adding a sticker from the Memories in the Making Accessory Pack.

IMG_0669

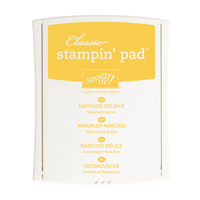
The 3×4″ card at the top right of page two is another UV resist card which I sponged Daffodil Delight and I attached the photo using the washi tape from the Accessory Pack.

I do hope you’ve enjoyed my project for this week’s CTC Blog Hop.

And remember – CASEing the Catty is running a monthly challenge – so you can play along too!

If you have been inspired by our projects and want to share your own, just click on the Join Challenge Button below and you can add your project at the linky you will find at the bottom of the post.

ctc_challengeA winner will be chosen and announced on the first post of the following month.

Now hop on over to Simone Bartrum’s blog to check out her stunning project!

Elizabeth Gross  Simone Bartrum

And remember if you get lost along the way – head to the CTC Blog Home Page where you will see all those involved in this week’s CASEing the Catty Blog Hop and make sure you haven’t missed any of the great creations!


Thanks for stopping by and hope you enjoy all the other posts in the hop!

Logo 72ptUntil next time


Jackie

I hope you enjoyed this post,

As always – if you wish to know anything more about  info in this post, or to get a catalogue, or to buy any of the items mentioned in the post, please contact me.

Or you can shop 24/7 at my online Stampin’ Up! shop – just click on any of the products in the table below, and you should find yourself in my online shop at the page with information about the product.

Please do use the hostess code to support creativeJax if you are ordering online!  Entering the Hostess code combines the value of online orders – which assists me to offer events and thank you’s for my customers and support charities such as Ronald MacDonald House and local events where I donate product and/or classes.

The current Hostess Code can be found at the top right of my webpage.

If your order is over $350, please do not use this code as You become the hostess and get the Rewards!

If you would like to find out about joining my Stampin’ Up! Team (thINK Creative) –  Please do get in touch – I would love to chat to you about that.

You can receive my Blog Posts directly by email or join my monthly Newsletter group –  you can subscribe using the buttons at the right of my page. 


Product List

Permanent link to this article: https://creativejax.co.nz/2016/02/stampin-up-ctc66-sale-a-bration/

Stampin’ Up! CTC Blog Hop – Happy Valentine’s Day!

Hi All

Hello and welcome to this week’s CASEing the Catty Blog Hop.

This week we are being inspired to create a Valentine’s Day Project from any of the Stampin’ Up!s current catalogues – Annual, Occasions or Sale-A-Bration. That’s a lot to choose from!

12465768_10153777824802158_1363854616063678406_o

Whether you’re joining the Hop here, or if you’ve hopped on over from the lovely Julia Quinna BIG hello!

Remember to click on through this week’s CTC crew to see plenty of inspirational projects that the crew have created for you – there’s a full list on the CTC blog page if you get lost along the way.

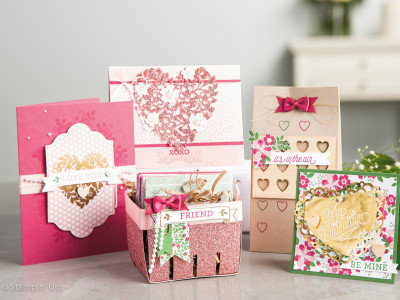
I’ve taken my inspiration from the Occasions Catalogue – I’m loving the Bloomin’ Heart Thinlits Die and like Julia – I chose it for my Valentine’s Day project!

Occasions16_p16_a1

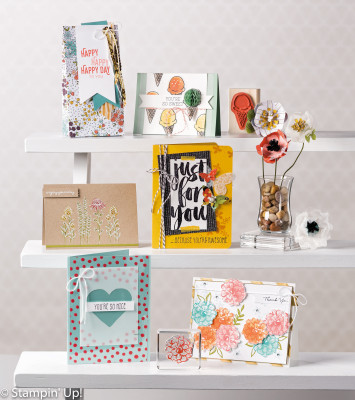
In fact last week I ran a class where people purchased the Bloomin’ Heart Die and Bloomin’ Love Stamp Bundle and we made all the projects in the picture above! It was lots of work but was a fantastic way to get all those stamps inked and give the die a good work out! Trust me – the projects are even more stunning in real life than they are in the catalogue photo – and they look gorgeous there!

But back to the task in hand!

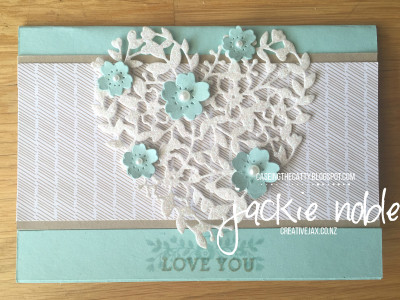
I CASE’d the one at the centre back – but decided I couldn’t really give DH (Darling Husband) a pretty pink card – so changed the colour palette.

2016_02_creativejax_ctc65_valentines

I’ve used Pool Party for the card base and flowers, and matted the Love Blossoms DSP onto Crumb Cake.

Often if I am matting something that goes across the entire width of my card, then I will simply add a strip at the top and the bottom rather than use a larger piece of card behind the top layer. If I do need to use a whole piece of card to mat behind cardstock – then I will try to punch, or cut, out from the middle of the mat – no-one sees it and I get to use the shapes I’ve cut out on the project, or save them for another crafting day!

I stamped the flowers from the Blooming’ Love stamp set at the bottom of the cad in VersaMark Ink – I wanted the flowers – but didn’t want them to be particularly prominent.

And if you think the sentiment is blurry – it’s not! I stamped in Versamark ink first, then offset it a little and stamped in Crumb Cake to make it seem like a shadow. This is very easy to do with photopolymer stamps as you can see straight through them!

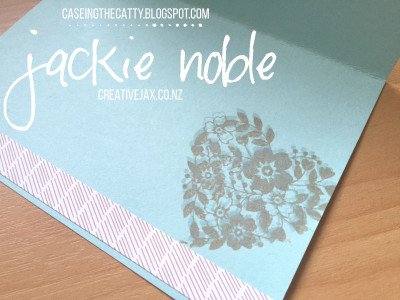
In the photo below you can see I did the same with the heart image on the inside of the card.

2016_02_creativeJax_ctc65_valentines_inside

I also carried the DSP through to the inside of the card.

In the original card the heart was cut in Blushing Bride Glimmer paper. Gorgeous – but not what I was after! So out came the Dazzling Details Glimmer Paper for my heart.

The Glimmer paper can be tricky to cut using the thinlits. The paper has a wax-like coating on the back which can be a bit stubborn when it comes to running it through the Big Shot. If you are having trouble cutting the Glimmer paper here’s a couple of hints that I find helpful:

  • Use the Precision Base Plate
  • Run the paper and die through the Big Shot and back; then rotate 90º and run through and back again
  • Don’t repeatedly place the paper and die in the same place on the Big Shot platform – it’s best to move cutting location
  • You may need an extra shim under the Glimmer Paper. I put a piece of card directly under the Glimmer Paper which gives the die a non-waxy surface to cut into
  • If it doesn’t matter which way the cutout is cut – you can turn the Glimmer Paper upside down – glitter side down and waxy side up. Don’t do this for words though!

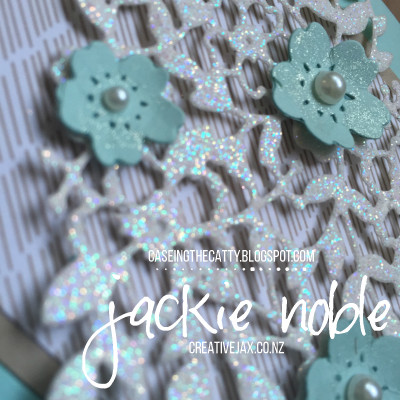
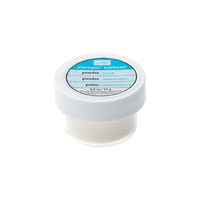
In the photo below, you can see that I’ve added some glitter to the flowers – yes – it’s Wink of Stella again – clear this time! Such a great match for the Dazzling Diamonds Glimmer Paper!

2016_02_creativejax_ctc65_valentines_closeup

I also just love the Bokeh affect the glimmer paper produced in this photo!

I do hope you’ve enjoyed my project for this week’s CTC Blog Hop celebrating Valentine’s Day!

And remember – this year, CASEing the Catty is running a monthly challenge – so you can play along too!

If you have been inspired by our projects and want to share your own, just click on the Join Challenge Button below and you can add your project at the linky you will find at the bottom of the post.

ctc_challengeA winner will be chosen and announced on the first post of the following month. So do check out this week’s CTC Blog Post as well to see who won January’s Challenge.

Now hop on over to Simone Bartrum’s blog to check out her stunning project!

Julia Quinn  Simone Bartrum


And remember if you get lost along the way – head to the CTC Blog Home Page where you will see all those involved in this week’s CASEing the Catty Blog Hop and make sure you haven’t missed any of the great creations!

As well as being the theme for this week’s CTC Blog Hop – Valentine is the “Just for Girls” word this week – #329.

Just us Girls Word Week #329

Thanks for stopping by and hope you enjoy all the other posts in the hop!

Logo 72ptUntil next time


Jackie

I hope you enjoyed this post,

As always – if you wish to know anything more about  info in this post, or to get a catalogue, or to buy any of the items mentioned in the post, please contact me.

Or you can shop 24/7 at my online Stampin’ Up! shop – just click on any of the products in the table below, and you should find yourself in my online shop at the page with information about the product.

Please do use the hostess code to support creativeJax if you are ordering online!  Entering the Hostess code combines the value of online orders – which assists me to offer events and thank you’s for my customers and support charities such as Ronald MacDonald House and local events where I donate product and/or classes.

The current Hostess Code can be found at the top right of my webpage.

If your order is over $350, please do not use this code as You become the hostess and get the Rewards!

If you would like to find out about joining my Stampin’ Up! Team (thINK Creative) –  Please do get in touch – I would love to chat to you about that.

You can receive my Blog Posts directly by email or join my monthly Newsletter group –  you can subscribe using the buttons at the right of my page. 


Product List


Permanent link to this article: https://creativejax.co.nz/2016/02/stampin-up-ctc65-valentines/

Creative Inkers 2016 Occasions and Sale-A-Bration Blog Hop

Hello and welcome to the Creative Inkers Team Blog Hop!

2016_Feb_Title bar

I’m so lucky to be part of the fabulous Creative Inkers Team – with Jacque Williams as our amazing Team Leader!

In this Blog Hop team members are showcasing some of the wonderful products from the recently released Occasions and Sale-A-Bration Catalogues – and what a lot to choose from.

You may be joining the Hop here or have come from the talented Ria Kaire – either way – I hope you enjoy my creation and hop on through and look at the amazing creations by my fellow Creative Inkers!
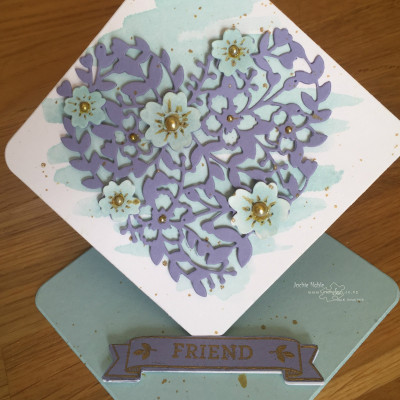
2016_02_creativeJax_CreativeInkers_Blooming_Heart copy

I was inspired by the talented Brenda Quintana of Qbee’s Quest who posted a gorgeous Easel card recently. Brenda is also part of the Creating Success with Ronda Wade Team. I love Ronda’s trainings and she has certainly helped me grow my creativeJax business – thanks. I am sooooo looking forward to meeting Ronda, her training team and many others who do Ronda’s training on the Stampin’ Up! Grand Vacation in late May. I feel like I know many of them well already so it will be fantastic to meet face-to-face! But not only do I get to meet them – but it will be on a Cruise Ship – in the Mediterranean – along with other Stampin’ Up! Demos who have earned the Incentive Trip! All a little overwhelming I must say!!!

Anyway – back to the card!
2016_02_creativeJax_CreativeInkers_Blooming_Heart5 copy

I used the large square die from the Project Life Paper Clips Thinlits to cut my card base. The framelit is 4″ x 4″. Because I started with an imperial measure – I’ll stick with inches rather than intermingle centimeters and inches. The card base is a 10 3/4″ x 5 3/4″ piece of Soft Sky Card stock, scored on the long side at 2 7/8′ and 5 3/8″. Fold the card base in half and run through the Big Shot with the large square on top of both layers.

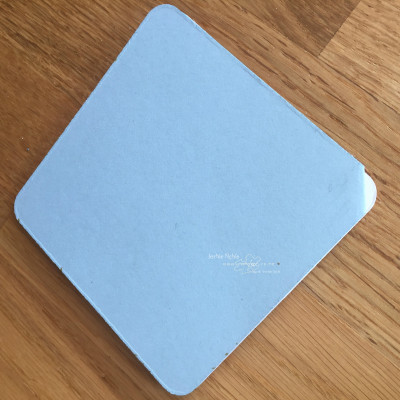
When I ran the die through the BigShot, I positioned the square thinlit on the cardstock as a diamond (not a square). I made sure that the other scoreline ran through the centre of the die and also that one corner wasn’t cut – this makes the join at the back of the easel. You can see this uncut part on the view from the back of the card below. Make sure the two score lines are well burnished before constructing the card.

2016_02_creativeJax_CreativeInkers_Blooming_Heart6 copy

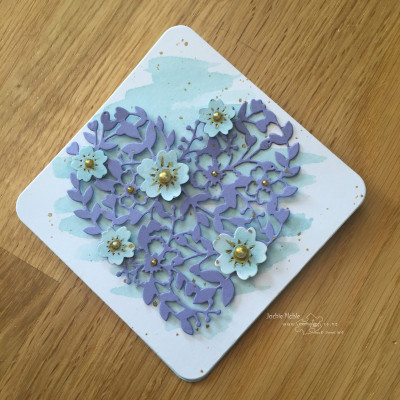
I cut a 4 x 4″ piece of Shimmery White Cardstock using the same thinlit. Using an Aqua Painter and Soft Sky Ink Refill I watercoloured onto this square. I positioned the square on the diagonal so that the horizontal watercolour lines were on a diamond shape – rather than a square. This diamond was then attached to the card base.

2016_02_creativeJax_CreativeInkers_Blooming_Heart1 copy
The Heart is cut from Wisteria Wonder using the Bloomin’ Heart Thinlit and adhered to the Shimmery White diamond with dimensionals – AFTER the watercolouring is completely dried!

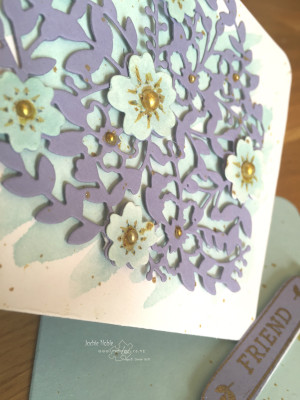
The flowers were also cut from shimmery White using the other dies from the Blooming Heart Thinlit set and watercoloured in Soft Sky before positioning onto the heart with Glue dots. The attached Basic Pearls got some Wink of Stella Treatment! I coloured them and added a few details around each pearl with the Gold Glitter Brush

I cut two banners using the Large Numbers framelits – one in Whisper White and one in Wisteria Wonder. On the Wisteria Wonder banner I stamped and heat embossed the banner and sentiment in Gold using stamps from the Bloomin’ Love set. I layered these for extra strength and stuck them to the inside of the card base to act as the anchor point when the easel card is opened.

2016_02_creativeJax_CreativeInkers_Blooming_Heart4 copyAs a final touch – I flicked some splatters of Gold Wink of Stella over both the inside and outside of the card.

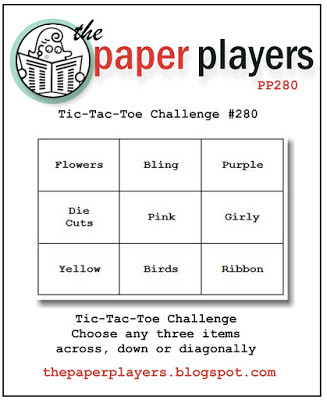
The card also completes the top line in this week’s Paper Players Tic-Tac-Toe Challenge (PP280).

Paper Palyers PP280

I guess the card also completes the left hand column – gold is yellow after all!

I do hope you’ve enjoyed my creation for the Creative Inkers Blog Hop. You can now Hop on over to the amazing Sally Williams to see what she has created for you! The buttons will take you back to Ria or forward to Sally depending on the order you are hoppin’ in!


2016_Feb_Previous2016_Feb_Next

If you do get lost along the way – I’ve included a list of all the participants at the end of the post – Enjoy!


Thanks for stopping by and hope you enjoy all the other posts in the hop!

Logo 72ptUntil next time


Jackie

I hope you enjoyed this post,

As always – if you wish to know anything more about  info in this post, or to get a catalogue, or to buy any of the items mentioned in the post, please contact me.

Or you can shop 24/7 at my online Stampin’ Up! shop – just click on any of the products in the table below, and you should find yourself in my online shop at the page with information about the product.

Please do use the hostess code to support creativeJax if you are ordering online!  Entering the Hostess code combines the value of online orders – which assists me to offer events and thank you’s for my customers and support charities such as Ronald MacDonald House and local events where I donate product and/or classes.

The current Hostess Code can be found at the top right of my webpage.

If your order is over $350, please do not use this code as You become the hostess and get the Rewards!

If you would like to find out about joining my Stampin’ Up! Team (thINK Creative) –  Please do get in touch – I would love to chat to you about that.

You can receive my Blog Posts directly by email or join my monthly Newsletter group –  you can subscribe using the buttons at the right of my page. 

Product List
 

Product List

2016_Feb_Title bar


Permanent link to this article: https://creativejax.co.nz/2016/02/creative-inkers-blog-hop/

Hello Birthday Girl!

Hello!

Yesterday we celebrated a family birthday – our daughter’s. Happy Birthday Beth!

If you’ve read a few of my posts – you will know that as well as card making – Beth enjoys baking and cake-decorating. She makes cupcakes for my classes, and she bakes and decorates cakes for the family and friends.

She made cupcakes to take into work to celebrate her birthday, and make a cake to take out to her birthday dinner last night.

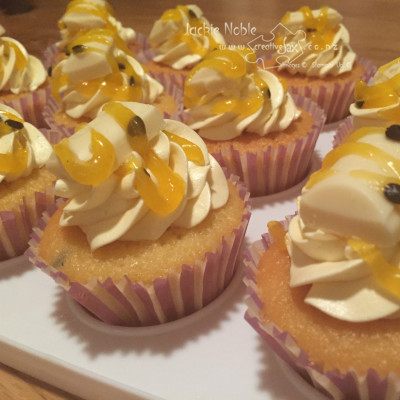
Here are the cupcakes.

2016_01_creativeJax_GDP020_Beth_Birthday_Cupcakes

Beth is a student – about to start her Masters in Building Science – but she earned a Summer Scholarship from University and is based at BRANZ so she is getting a taste of full-time employment! By the sounds of it these were well received by her co-workers!

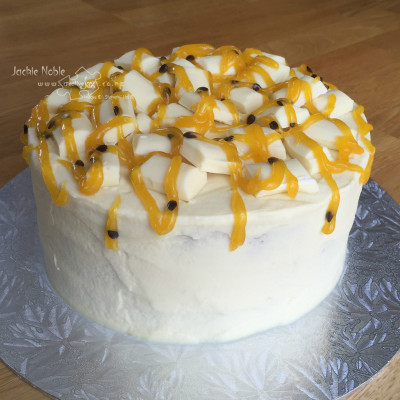
Here’s her cake

2016_01_creativeJax_GDP020_Beth_Birthday_Cake

Nom-Nom it was delicious! Passionfruit and white chocolate mudcake! Along with delicious filling, white chocolate ganache icing and scrumptious topping!

And what does this have to do with cards I hear you ask? – well when I saw the Global Design Project Challenge for the week i knew instantly what I was going to make for Beth’s Birthday card! You can check out the project that I CASEd by clicking on the image

Global Design Project #GDP020

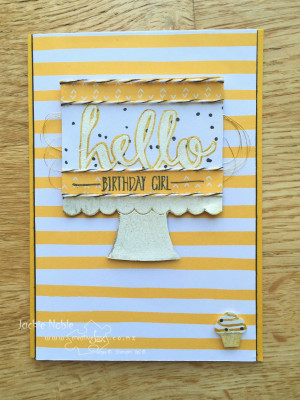
With the #GDP020 in mind – here is the card I made for Beth.

2016_01_creativejax_GDP020_Beth_Birthday2

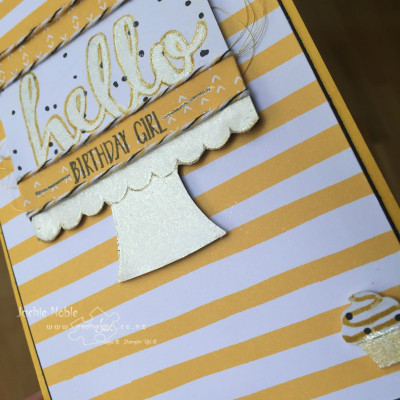
This was a fun card to put together – I’m loving the Hello stamp set! It’s a Sale-A-Bration set that is only available until the 15th February so if you don’t want to miss out – place a qualifying order with me before then to receive it for FREE. The striped paper from the It’s My Party DSP stack was ideal as a representation of the layers in Beth’s cake and also for the challenge – perfect!

The cake was made using a couple of the other patterns – the little black dots reminded me of the passionfruit seeds! I did stamp the “hello” and cake stand with Versamark ink and heat emboss with white embossing powder to cover the seeds!  I also outlined the sentiment with my Crushed Curry Stampin’ Write Marker to make it stand out.

You can’t really tell in that picture, but I added some shine with the Wink of Stella Glitter Brushes. In this close up you can see some shine on the cake stand and sentiment and the cup cake case.

2016_01_creativejax_GDP020_Beth_Birthday_closeup

I’ve used the clear Wink of Stella Glitter Brush on the outside of the card. I’ve also intertwined the Crushed Curry Baker’s twine with a black thread pulled from the Baker’s Twine Combo Pack

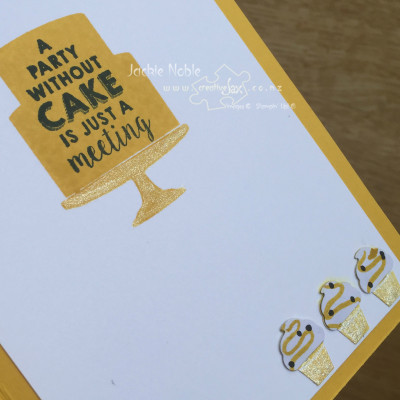
2016_01_creativeJax_GDP020_Beth_Birthday_inside

On the inside the holders were again “blinged up” with the Clear Brush while the cake stand got some attention from the gold Wink of Stella Glitter Brush.

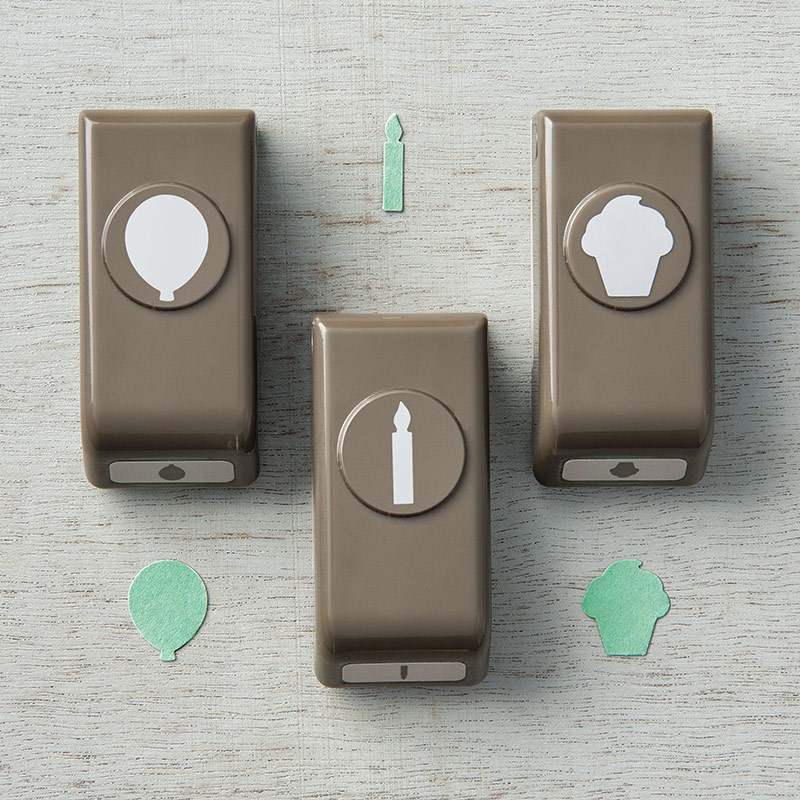
In a household that LOVES cupcakes  – I simply ADORE the cute wee cupcake punch that is in the Party Punch Pack!

Party Punch Pack

They are all pretty darn cute! This set of punches is going to see a lot of action!

In fact the whole It’s My Party Suite simply rocks! I’ve used the Party Wishes stamp set for the cupcakes and the cake on the inside of the card.

The cake on the outside uses the Build a Birthday set – and it works so well with the Hello stamp set!

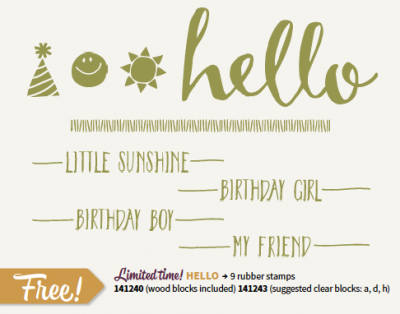
And remember – if you would like the gorgeous Hello stamp set  – it is a limited release and won’t be available after 15 March – so contact me to place an order or place a qualifying order online 🙂

Hello - SAB stamp set

Logo 72pt

Until next time


Jackie

I hope you enjoyed this post,

As always – if you wish to know anything more about  info in this post, or to get a catalogue, or to buy any of the items mentioned in the post, please contact me.

Or you can shop 24/7 at my online Stampin’ Up! shop – just click on any of the products in the table below, and you should find yourself in my online shop at the page with information about the product.

Please do use the hostess code to support creativeJax if you are ordering online!  Entering the Hostess code combines the value of online orders – which assists me to offer events and thank you’s for my customers and support charities such as Ronald MacDonald House and local events where I donate product and/or classes.

The current Hostess Code can be found at the top right of my webpage.

If your order is over $350, please do not use this code as You become the hostess and get the Rewards!

If you would like to find out about joining my Stampin’ Up! Team (thINK Creative) –  Please do get in touch – I would love to chat to you about that.

You can receive my Blog Posts directly by email or join my monthly Newsletter group –  you can subscribe using the buttons at the right of my page. 

Product List
Product List

Permanent link to this article: https://creativejax.co.nz/2016/01/hello-birthday-girl/

Stampin’ Up! CTC Blog Hop – It’s My Party meets Going Global

Hi All

Hello and welcome to this week’s CASEing the Catty Blog Hop.

12465768_10153777824802158_1363854616063678406_oThis week we are using the “it’s My Party” Section of the Stampin’ Up! Occasions Catalogue as the starting point for our creations.

Each crew member will either directly CASE (Copy and Share Everything) or use a sketch/layout, colour combo, embellishment, to name a few examples, as a springboard for our own creation.

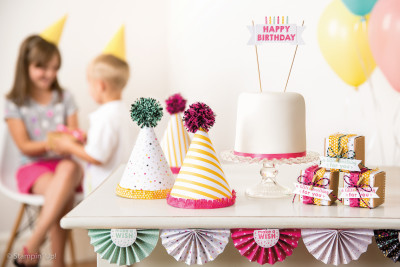
Occasions16_p04_a

New colour combo gets its first outing!


Whether you’re joining the Hop here, or if you’ve hopped on over from the talented Monique Fielder  – a BIG hello!

Remember to click on through this week’s CTC crew to see plenty of inspirational projects that the crew have created for you – there’s a full list on the CTC blog page if you get lost along the way.

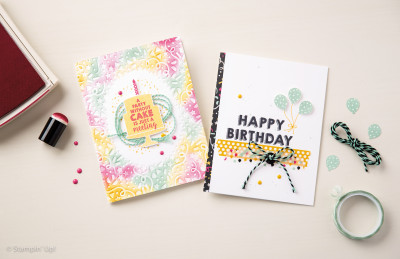
I’ve CASE’d the card on the left of the photo below – the one with the cake on it.

Occasions16_p04_b

As I’ve used the colour palette from the It’s My Party Suite (Melon Mambo, Crushed Curry, Mint Macaron, Basic Black, Sahara Sand) for the last couple of weeks – I had to have a change for this week. So I decided to use the layout and techniques from the card; but go with a very different colour palette and product suite – Going Places (page 38).

Here’s my CASE

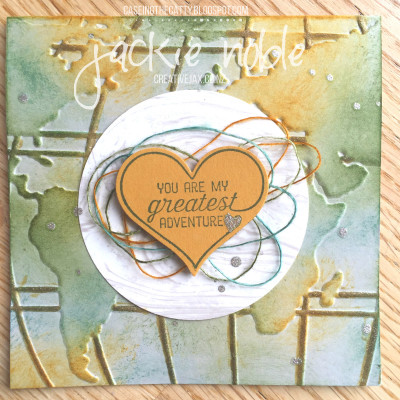
2016_01_creativejax_ctc63_its_my_party_goingglobal


The Mossy Meadow, Lost Lagoon, Delightful Dijon, Sahara Sand, Very Vanilla and Basic Black colours have a real earthy feel to together. Definitely a great product suite for masculine cards.The sentiments are  – well – less masculine. I think this is a fantastic mix – you can get a bit mushy in a non-mushy sort of way. Does that make sense?

While I’ve change the card dimensions to be square, I’ve followed the original layout fairly closely.

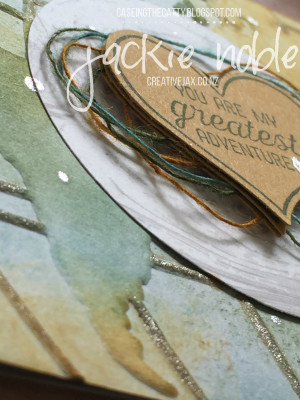
The World Traveler Texture Embossing folder provides a great background but doesn’t have the un-embossed section in the middle like to cute Confetti Embossing folder, so to get that effect I added a circle of the Going Places Designer Series Paper Stack.

I’ve sponged the embossing roughly with Mossy Meadow, Lost Lagoon and Delightful Dijon. The sentiment is stamped in Mossy Meadow on Delightful Dijon cardstock and punched out using the coordinating Sweetheart punch.

Are you wondering where those coloured twines came from – I coloured then to match. As there is no thread in the suite colours, I unravelled some Very Vanilla Thick Baker’s Twine and rubbed a few strands across each of the Mossy Meadow, Lost Lagoon and Delightful Dijon ink pads.

There were cute little enamel dots on the original card – in my CASE I’ve splattered dots of the “clear” Wink of Stella instead.

I’m simply loving the sparkle, cool effects and detail I can add to my projects with the Wink of Stella Glitter Brushes. Also a shiny wee heart on the sentiment! The photo doesn’t really show the way it sparkles.

A couple of things about the Wink of Stella Glitter Brushes.

  • Unscrew the barrel of the brush and remove the black ring before using the brush for the first time (this pierces the barrel and lets the “ink” flow
  • Store the brushes in an upright position – this prevents then from leaking. This is different from the Stampin’ Write Markers which should be stored flat/horizontal.
  • Shake the glitter brushes well before each use. There is a small ball in the barrel which you should hear moving. This mixes the glitter and the carrier medium so that you get an even amount of glitter throughout the life on the pen.
  • Open and use your Wink of Stella Glitter Brush soon after you receive it. There have been some colour/labelling mismatches from the manufacturer so it pays to check. If your is the incorrect colour – contact your demonstrator as Stampin’ Up! is fantastic at rectifying issues for customers.


2016_01_creativejax_ctc63_its_my_party_goingglobal_closeup

In addition to the splattered dots of clear Wink of Stella, I also added some sparkle to the embossed Longitude and Latitude lines with the Gold Wink of Stella Glitter Brush.

In the closeup above you can also see that in fact I used multiple layers of the sweetheart punch.

I sandwiched the thread between two layers to make it secure and stay where I wanted it. I also like the extra dimension I get when I use several layers.

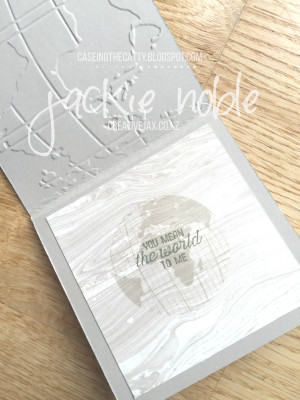
2016_01_creativejax_ctc63_its_my_party_goingglobal_inside

I added some Going Places DSP as the card inner after stamping it with two other stamps from the Going Global stamp set. The world map is stamped in Sahara Sand and the sentiment in Mossy Meadow. The images in the Going Global stamp set is perfect for layering and for collaging as well stamping as on their own. Several also match punches or dies – so that’s handy!

Another week another CASE! Again – I had lots of fun CASEing the Catty! I hope you’ve enjoyed reading about it. I’m thinking I may have hubby’s Valentines Day card sorted 😉

Next up is the amazing Simone Bartrum – hop on over to check out her CASE!

Monique Fielder  Simone Bartrum


And remember if you get lost along the way – head to the CTC Blog Home Page where you will see all those involved in this week’s CASEing the Catty Blog Hop and make sure you haven’t missed any of the great creations!

Thanks for stopping by and hope you enjoy all the other posts in the hop!

Logo 72ptUntil next time


Jackie


I hope you enjoyed this post,

As always – if you wish to know anything more about  info in this post, or to get a catalogue, or to buy any of the items mentioned in the post, please contact me.

Or you can shop 24/7 at my online Stampin’ Up! shop – just click on any of the products in the table below, and you should find yourself in my online shop at the page with information about the product.

Please do use the hostess code to support creativeJax if you are ordering online!  Entering the Hostess code combines the value of online orders – which assists me to offer events and thank you’s for my customers and support charities such as Ronald MacDonald House and local events where I donate product and/or classes.

The current Hostess Code can be found at the top right of my webpage.

If your order is over $350, please do not use this code as You become the hostess and get the Rewards!

If you would like to find out about joining my Stampin’ Up! Team (thINK Creative) –  Please do get in touch – I would love to chat to you about that.

You can receive my Blog Posts directly by email or join my monthly Newsletter group –  you can subscribe using the buttons at the right of my page. 

Product List
Permanent link to this article: https://creativejax.co.nz/2016/01/stampin-up-ctc-blog-hop-its-my-party-meets-going-global/

Stampin’ Up! CTC Blog Hop – Sale-A-Bration

Hi All

Hello and welcome to this week’s CASEing the Catty Blog Hop.

This week we are all  CASEing one of our favourite projects from the new 2016 Sale-A-Bration Brochure – which was  released on Tuesday 5th January. You can read about Sale-A-Bration (SAB) on the Stampin’ Up! web page

CASEing the Catty - Sunday Blog Hop

Whether you’re joining the Hop here, or if you’ve hopped on over from the talented Helen Heil  – a BIG hello!

Remember to click on through this week’s CTC crew to see plenty of inspirational projects that the crew have created for you – there’s a full list on the CTC blog page if you get lost along the way.

The items that are available to earn for FREE during the 2016 SAB period (5 January – 31 March) are stunning and I didn’t get past the cover in choosing a favourite to CASE!

US_AU_EU_16_SAB_Demo_Images-30


I was drawn to the bright card in the centre of the cover and thought it could do with some Pals Paper Arts treatment! This is a challenge site that “Showcases the Art of Papercrafting” – which this week features a colour challenge by Brian King – #PPA283.

Pals Paper Arts - PPA283


After using a similar palette last week (you can find my “Enjoy the Little Things” CASE here) I was interested to see if I could work with PPA283 and the gorgeous Botanical for You stamp set  – but without any DSP!

Here’s my CASE

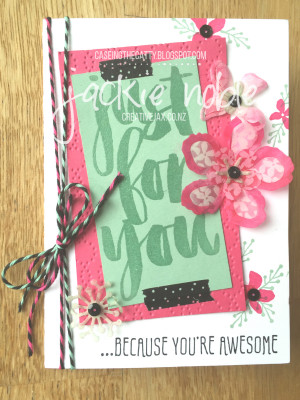
2016_01_17_creativejax_ctc62_SAB_BotanicalsForYou

I’ve kept pretty true to the original design but obviously changed the colours – a lot! The colours are those in the It’s My Party Suite.

The Baker’s Twine combo was the perfect accompaniment – though I’ve only put two wrap-arounds as it is a very thick twine compared to our standard Baker’s Twine which was on the original.

I’ve added some texture to the Melon Mambo mat with the elegant dots embossing folder.

Here’s a little tip. See how I’ve put the de-bossed side up rather than the embossed side? Well I do that so that the card sits off the page a little. It’s like popping it up on dimensionals but not as much height as you would get if you’d used dimensionals – I like the effect this gives.

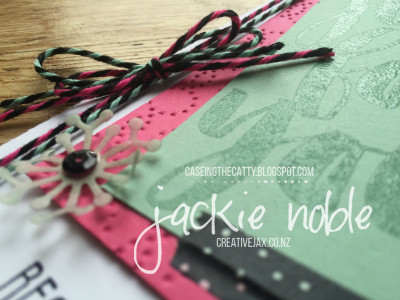
2016_01_17_creativejax_ctc62_SAB_BotanicalsForYou_closeup

I originally stamped the large sentiment in Black Momento but decided I wanted to restrict the black on the card to be highlights rather than be a featured colour. Hence the black in the twine, the washi, the sequins and the smaller sentiment.

If you are wondering where I got those black sequins from – a trusty Project Life Accessory pack – Love Story. I do get lots of use out of both the Love Story Card Collection and the Accessory Pack which has a hugely versatile colour palette – Basic Black, Basic Grey, White and Silver!

But back to that large sentiment – I stamped it in Versamark to get tone on tone colour, and then heat embossed with clear embossing powder to get that shine!

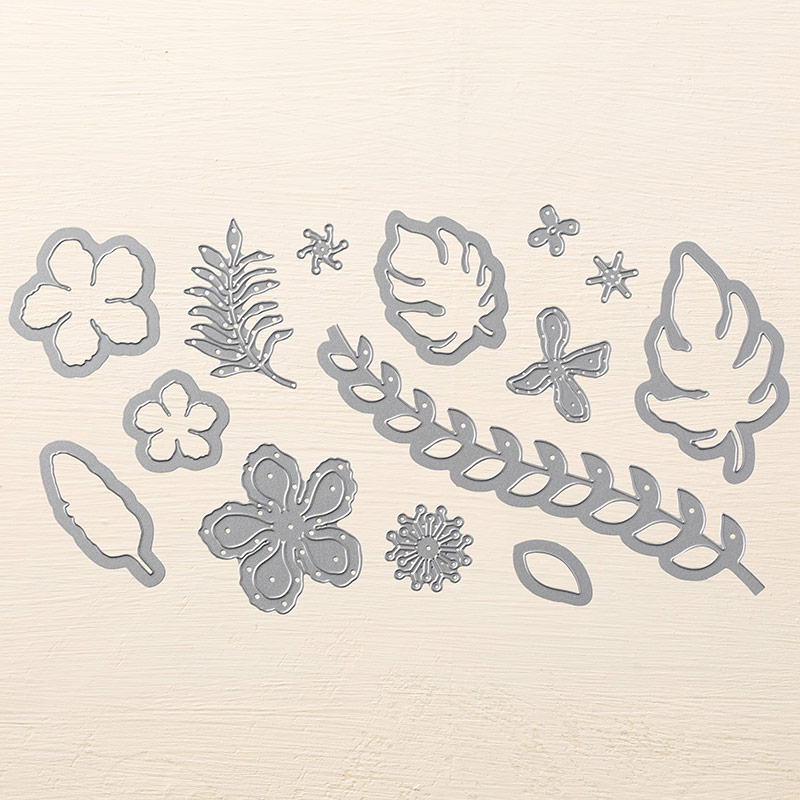
I decided to use the Botanical Builder Framelits rather than butterflies that were on the original card. In the picture above you can see one of the shapes – there are 14 Dies in the set! There are leaves, flower petals, flower centres and even a leaf border! Heaps of options – and you can use them individually or build up layers – just as the name suggests!

Botanical Builder Framelits

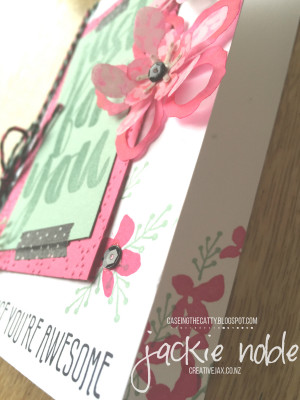
It’s hard to tell in the photos above but I have cut the shapes from the Botanica’s vellum stack – another gorgeous SAB item that co-ordinates with the Botanical Garden Suite of products – and which you can earn for free during SAB! I then sponged the shape with some Mint Macaron ink on a sponge dauber. I found the vellum to be a better weight for my card rather than card stock. I considered some It’s My Party DSP – but I’d said I wasn’t going to use DSP in this project – well vellum isn’t DSP – right?


What you can’t tell from the above photos is the way some of the dies in the Botanical Builder framelits cut a 3D type flower – it cuts two petals at the same time. In the photo of the whole card above this is shown by the dark pink rim of the petal and the paler inside (both sponged with Melon Mambo – the outer just has more ink added). This looks like a single layer in that photo – but check out the photo below.

2016_01_17_creativejax_ctc62_SAB_BotanicalsForYou_layers

This flower’s bottom petal is like two layers – the dark outer rim I’ve bent downwards, and the paler inner part of the petal I’ve bent upwards – giving a 3D effect. I’ve then added another Melon Mambo sponged petal and placed a Mint Macaron sponge flower centre on top.

I did joint these 3 layers together with a SIlver Mini Brad to keep them securely together but as I wanted black centres, I then adhered a black sequin onto the brad using the Fine Tip Glue Pen with the sequin placed curve down. I love how the Fine Tip Glue pen dries clear and non-tacky.

I sure did have fun with this CASE and colour combo – a bit of a challenge for me – as I’m not really a pink sort of a girl!

Next up you will see a very different colour palette in Rachel Palmieri’s CASE – using The Sky is the Limit stamp set – stunning!

Helen Heil  1931443_10153736740697158_8641773008449326149_n


And remember if you get lost along the way – head to the CTC Blog Home Page where you will see all those involved in this week’s CASEing the Catty Blog Hop and make sure you haven’t missed any of the great creations!

Thanks for stopping by and hope you enjoy all the other posts in the hop!

Logo 72ptUntil next time


Jackie

I hope you enjoyed this post,

As always – if you wish to know anything more about  info in this post, or to get a catalogue, or to buy any of the items mentioned in the post, please contact me.

Or you can shop 24/7 at my online Stampin’ Up! shop – just click on any of the products in the table below, and you should find yourself in my online shop at the page with information about the product.

Please do use the hostess code to support creativeJax if you are ordering online!  Entering the Hostess code combines the value of online orders – which assists me to offer events and thank you’s for my customers and support charities such as Ronald MacDonald House and local events where I donate product and/or classes.

The current Hostess Code can be found at the top right of my webpage.

If your order is over $350, please do not use this code as You become the hostess and get the Rewards!

If you would like to find out about joining my Stampin’ Up! Team (thINK Creative) –  Please do get in touch – I would love to chat to you about that.

You can receive my Blog Posts directly by email or join my monthly Newsletter group –  you can subscribe using the buttons at the right of my page. 


Product List


Permanent link to this article: https://creativejax.co.nz/2016/01/stampin-up-ctc62-sab/

Stampin’ Up! CTC Blog Hop – New Occasions Catty – Favourite Project

Hi All

Hello and welcome to this week’s CASEing the Catty Blog Hop – the first for 2016.

This week we are CASEing our favourite project from the new 2016 Stampin’ Up! Occasions Catalogue – which was only released on Tuesday (5th January).

12465768_10153777824802158_1363854616063678406_o

Whether you’re joining the Hop here, or if you’ve hopped on over from the talented Simone Bartrum (who shared a great tip in her card showcasing the  Botanical Gardens Suite)  – a BIG hello!

Remember to click on through this week’s CTC crew to see plenty of inspirational projects that have the crew have created – there’s a full list on the blog page if you get lost along the way.


There sure are lots of amazing products and projects in the new catty! I love the stamps, and the framelits, and the Project Life Collection, and the embossing folders, and the ribbons, and the embellishments, and the DSP, and the kits, and the punches, and the colours, and the tools , and …

You get the idea! 🙂

How is a girl to choose?!

Well I finally did make a choice and decided to CASE the Enjoy the Little Things Project Kit (page 33).

2016_creativejax_ctc61_enjoyKit_collage

I had such fun making this Home Décor piece up, and just love the variety of the interchangeable display pages – of which there are 13 – but I’m only CASE’ing one today!

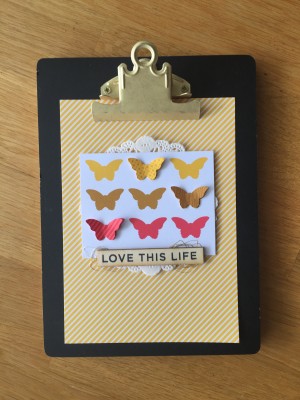
This is the page I’ve had displayed in my studio since making the Kit a couple of weeks ago – and it is true – I do “Love This Life”!

IMG_0328

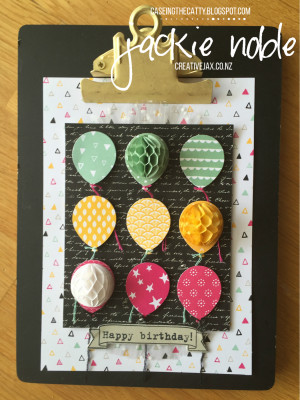
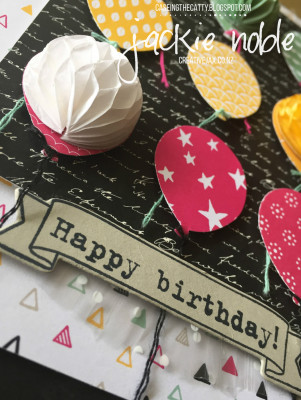
For my CASE I also wanted to showcase some of the fantastic DSPs (Designer Series Papers) that are in the catty  – and thought the “Love this Life” page was perfect to do this! I’ve replaced the butterflies with balloons punched using one of the awesome new balloon punches – the Balloon Bouquet Punch.

Here’s my CASE.

2016_01_creativejax_ctc61_Clipboard

I punched the balloons from four of the six different Designer Series Papers that are in the catalogue (excluding the Specialty DSP – Shine On)

Isn’t it great how you can mix and match so many of the DSPs!

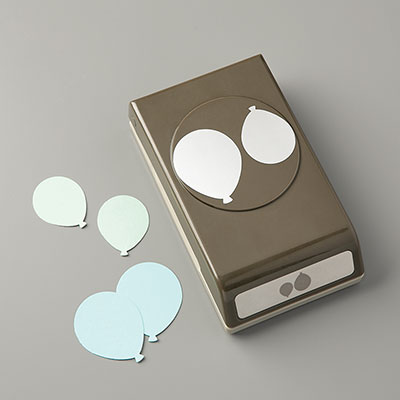
The balloons are the smaller of the two balloons on the Balloon Bouquet Punch.

Balloon Bouquet Punch

And don’t you love those Honeycomb Embellishments? They fit many things in the Occasions Catalogue and Sale-A-Bration – including this balloon!

These embellishments come in Whisper White, Mint Macaron and Blushing Bride – so I recoloured a white one to match my colours by spritzing it with Crushed Curry refill ink.

The original project had a Tea Lace Paper Doily behind the butterflies. I replaced this with a Polka Dot Cone Cellophane Bag which I snipped with the Fringe Scissors – you can sort of see this in the closeup below.

2016_01_creativejax_ctc61_Clipboard_closeup

The balloon strings were made using the Baker’s Twine from the Baker’s Twine Combo which I untwisted and split apart to get the individual colours.

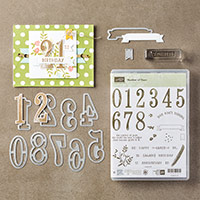
If you follow my blog you’ll know I love how so many of Stampin’ Up! products co-ordinate – and that is certainly the case when I made the sentiment for my page.  The words come from the Party with Cake stamp set (page 7) and I’ve stamped the banner from the Number of Years set and cut with the coordinating Large Numbers Framelits. And I did do it in that order – stamp words, stamp banner and then cut. The photopolymer banner stamp made it easy to get perfect placement around the words!

The Number Bundle (stamps and framelits) is one of my favourite bundles in the catalogue – I do hope we get a similar set of the alphabet at some point – fingers crossed!

So hop on over to the next Blog where Emma Palonek also features the Numbers bundle in her gorgeous project.


      1931443_10153736740697158_8641773008449326149_n


If youhave any trouble with links – you can hop on along to the CTC Blog Home Page where you will see all those involved in this week’s CASEing the Catty Blog Hop and make sure you’ve seen everyone.

Thanks for stopping by and hope you enjoy all the other posts in the hop.

Logo 72ptUntil next time

Jackie


I hope you enjoyed this post,

As always – if you wish to know anything more about  info in this post, or to get a catalogue, or to buy any of the items mentioned in the post, please contact me.

Or you can shop 24/7 at my online Stampin’ Up! shop – just click on the SHOP NOW link on the right hand side of my page and you should find yourself in my online shop.

Please do use the hostess code to support creativeJax if you are ordering online!  Entering the Hostess code combines the value of online orders – which assists me to offer events and thank you’s for my customers and support charities such as Ronald MacDonald House and local events where I donate product and/or classes.

The current Hostess Code can be found at the top right of my webpage.

If your order is over $350, please do not use this code as You become the hostess and get the Rewards!

If you would like to find out about joining my Stampin’ Up! Team (thINK Creative) –  Please do get in touch – I would love to chat to you about that.

You can receive my Blog Posts directly by email or join my monthly Newsletter group –  you can subscribe using the buttons at the right of my page. 

Permanent link to this article: https://creativejax.co.nz/2016/01/stampin-up-ctc61-occasions-favourite/

Stampin’ Up! CTC Blog Hop – CASEing a Design Team Member

Hi All

Hello and welcome to this week’s CASE-ing the Catty Blog Hop where we are taking inspiration from another of the Design Team Members.

11958270_10153542108322158_7728135852158303664_o

Whether you’re joining the Hop here, or if you’ve hopped on over from the talented Julia Quinn – a big hello!

Remember to click on through this week’s CTC crew to see plenty of inspirational projects that have the crew have created.

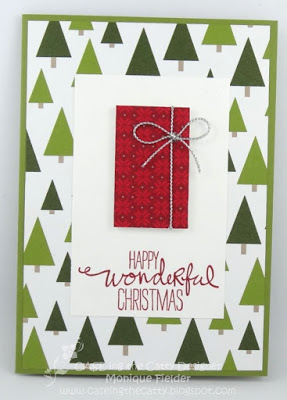
This week I’m lucky to be CASEing a project from Monique Fielder. It was hard to choose which project of Monique’s to CASE – I love her work! I settled on Monique’s Season of Cheer CASE – shown below

Christmas Card

When I was looking through Monique’s CTC Blog Hop posts and saw this card, I immediately thought of one of papers in the the new yet-to-be-released Designer Series Papers – Botanical  Gardens. This paper will be avaialble when the 2016 Occasions Catalogue goes live on 5 January. So my card contains a wee sneak peek!

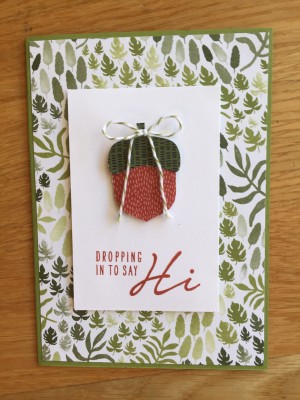
IMG_9805

I was so pleased when the retiring list from the Holiday catalogue was recently released and Acorny Thank You was NOT on it! I love the images and sentiments of the stamp set and think the coordinating punch is just too cute!

The Botanical DSP has a range of patterns – colourful, floral, monochromatic, abstract, large patterns, small patterns – it’s really versatile.

The acorn on front of my card uses the punch and two of the single colour DSP patterns (in Cajun Craze and Mossy Meadow) and is  finished off with a bow using Old Olive Baker’s Twine.

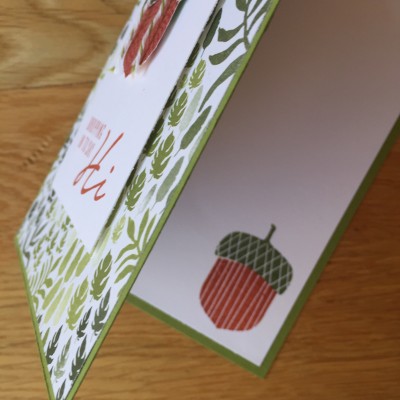
There is another acorn on the inside of the card which is stamped.

IMG_9809

This is our last CTC Blog Hop of 2015.

While I haven’t always made the Hop deadlines I sure have enjoyed working with the team and look forward to continuing with the CTC crew and taking inspiration from the catalogues in 2016 – trust me there is a LOT of inspiration in the new Occasions  and Sale-A-Bration catalogues!

Hop on over the the next Blog where Rebecca Scurr is CASEing one of Jessica Williams’ CASEs

12002113_10153542121067158_5668947851374858335_n


If you hop on along to the CTC Blog Home Page you will see all those involved in this week’s CASEing the Catty Blog Hop and make sure you’ve seen everyone.


Thanks for stopping by and hope you enjoy all the other posts in the hop.

Logo 72ptUntil next time


Jackie

I hope you enjoyed this post,

As always – if you wish to know anything more about  info in this post, or to get a catalogue, or to buy any of the items mentioned in the post, please contact me.

Or you can shop 24/7 at my online Stampin’ Up! shop – just click on the SHOP NOW link on the right hand side of my page and you should find yourself in my online shop.

Please do use the hostess code to support creativeJax if you are ordering online!  Entering the Hostess code combines the value of online orders – which assists me to offer events and thank you’s for my customers and support charities such as Ronald MacDonald House and local events where I donate product and/or classes.

The current Hostess Code can be found at the top right of my webpage.

If your order is over $350, please do not use this code as You become the hostess and get the Rewards!

If you would like to find out about joining my Stampin’ Up! Team (thINK Creative) –  Please do get in touch – I would love to chat to you about that.

You can receive my Blog Posts directly by email or join my monthly Newsletter group –  you can subscribe using the buttons at the right of my page. 

Permanent link to this article: https://creativejax.co.nz/2015/12/stampin-up-ctc60-caseing-a-design-team-member/

Stampin’ Up! CTC Blog Hop – Into the Woods

Hi All

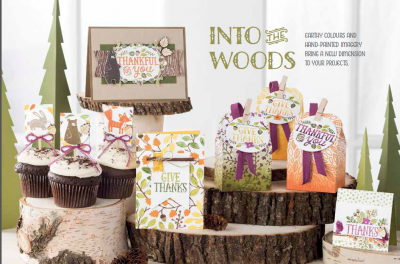
Hello and welcome to this week’s CASE-ing the Catty Blog Hop where we are taking inspiration from pages 42 – 45 of the Holiday Catalogue – this section features the into the Woods suite of products along with Lighthearted Leaves and Leaflets Framelits and the cute Acorny Thank You Bundle.

11958270_10153542108322158_7728135852158303664_o

Whether you’re joining the Hop here, or if you’ve hopped on over from the talented Elizabeth Gross  a big hello!

Remember to click on through this week’s CTC crew to see plenty of inspirational projects that have the crew have created – there’s a full list on the CTC Blog Hop Homepage.

You may have noticed I’ve been missing in action for a few weeks – life has been frantic and I couldn’t keep on top of everything that’s going on – so my blog – and newsletter have suffered. I could promise that is all going to change – but the next couple of months continue to have lots of family commitments – so we will see!

Screen Shot 2015-11-08 at 7.13.39 pm


One of the fun things that I did last month was teach a class at a Stamp Camp held by good friends Paula Dobson (of Stampinantics) and Sharlene Meyer (of Magpie Creates). I was so delighted and humbled to be asked to be their guest tutor.

I’d attended the camp as a participant for the previous couple of years and had always been so inspired and motivated by these two amazing crafters and the guest tutors they’d brought in. Pressure was on to live up to the standard everyone had set in the past.

All participants received the Endless Thanks stamp set as part of the registration and the classes over the weekend incorporated the set in different ways. Tasked with presenting a 3D project, I decided to tackle a sampler – something I’d not done before.

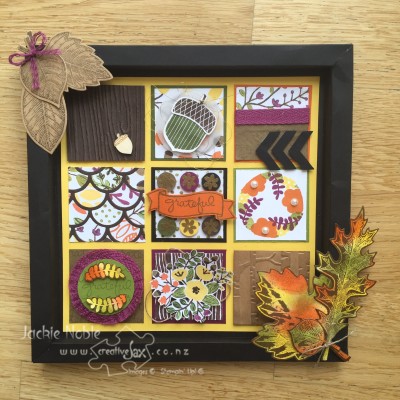
I was drawn to the colours of the Into the Woods Designer Series Paper so based my sampler around those.

IMG_8471

You can see that five of the nine squares featured the DSP itself.  I used the Into the Woods Ribbon in three different ways and included the Into the Woods Embellishments. It is great how these suites co-ordinate so beautifully.

… and how does this sampler relate to CASEing the Catty? I hear you thinking …

Well several of the squares showed techniques inspired by different projects in this week’s Into the Woods featured section.

  • the bow on the leaves at the top left of the frame were inspired by the cupcake toppers
  • the circle of frayed ribbon was inspired by the frayed edges of the small thanks card in the bottom left of the photo above (page 42)
  • the fussy cut DSP (bottom middle square) was also inspired by the same card
  • the layered leaves on page 44 cut using the Leaflet framelits provided the inspiration for my “leaf bouquets”
  • I added kraft cardstock to the sampler after falling in love with the textured pillow box on page 45
  • and the acorn with bows tied around the stem (page 45) were just too cute to leave out.

I loved trying out some new techniques – the inlayed DSP (using the Striped Scallop Thinlits) and Joseph Coat technique on the colourful leaves (using Vintage Leaves and Leaflet Framelits).

We even made the frame from a sheet of 12×12 Black card stock using the Simply Scored board.

I sure had fun sharing this class with those attending and was so impressed with the effort everyone put in to complete their samplers!

I’m the last in the hop this week so if you hop on along to the CTC Blog Home Page you will see all those involved in this week’s CASEing the Catty Blog Hop and make sure you’ve seen everyone.


12002113_10153542121067158_5668947851374858335_n


Thanks for stopping by and hope you enjoy all the other posts in the hop>

Logo 72ptUntil next time


Jackie


I hope you enjoyed this post,

As always – if you wish to know anything more about  info in this post, or to get a catalogue, or to buy any of the items mentioned in the post, please contact me.

Or you can shop 24/7 at my online Stampin’ Up! shop – just click on any of the products in the table below, and you should find yourself in my online shop at the page with information about the product.

Please do use the hostess code to support creativeJax if you are ordering online!  Entering the Hostess code combines the value of online orders – which assists me to offer events and thank you’s for my customers and support charities such as Ronald MacDonald House and local events where I donate product and/or classes.

The current Hostess Code can be found at the top right of my webpage.

If your order is over $350, please do not use this code as You become the hostess and get the Rewards!

If you would like to find out about joining my Stampin’ Up! Team (thINK Creative) –  Please do get in touch – I would love to chat to you about that.

You can receive my Blog Posts directly by email or join my monthly Newsletter group –  you can subscribe using the buttons at the right of my page. 


Product List
Permanent link to this article: https://creativejax.co.nz/2015/11/stampin-up-ctc55-into-the-woods/

Stampin’ Up! CTC Blog Hop – Gift Tags

Hi All

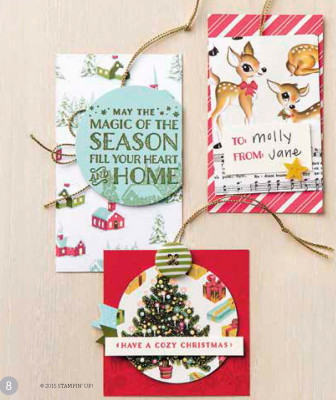
Hello and welcome to this week’s CASE-ing the Catty Blog Hop where we are taking inspiration from the Gift Tags in the Holiday Catalogue.

11958270_10153542108322158_7728135852158303664_o

Whether you’re joining the Hop here, or if you’ve hopped on over from the talented Alison Barclay – a big hello!

Remember to click on through this week’s CTC crew to see plenty of inspirational projects that have the crew have created.

I’ve included a list of participants at the end of the post – but if you get lost anywhere – there’s a full list on the CTC Blog Hop Homepage

Wow there sure are lots of tags in this catalogue! from the simple to the fancy – plain, colourful and everything in between.

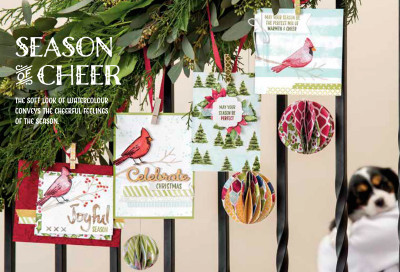
I took my inspiration from one of the tags on page 8 of the catty (the same one as Alison) and also the DSP baubles on page 28. I love how we can each look at the same project and it can be the springboard for such different ideas!

Page_08Page_28

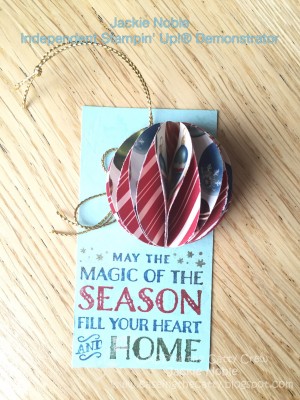
and I created this wee 3D tag …

IMG_8895

Rather than having the Pool Party as the circular feature like the original tag, I used that colour as my base and added half of a spherical bauble as the feature.

To make the “half bauble”, using the 1-3/4″ circle punch, I punched out eight (8) circles of the Home for Christmas DSP. I folded seven of these circles in half, and placed a glue dot in the middle of each folded circle – positioning the glue dot near the bottom. I then joined one folded circle to the next folded circle with a glue dot located near the top. This means the glue dots alternate between the layers. I placed adhesive (Tear and Tape) on the last (flat) circle, then opened up (or fanned out) the layered circles and stuck the half bauble to the sticky flat circle.

The tag also incorporates one of my all-time favourite techniques – colouring directly onto stamps with our Stampin’ Write Markers! This technique means every stamp can have so many variations and I find it is especially effective for Christmas sentiments.

I used the Pacific Point, Real Red and Mossy Meadow markers on the words from one of the Cozy Christmas stamps, and then some Versamark on the stars – which I gold embossed.

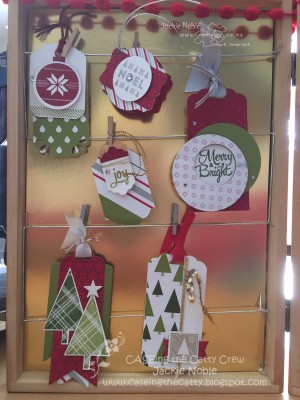
… and while we are on the theme of Tags – I thought I’d share the tags that were part of a class I recently did using the Lots of Joy stamp set from the Annual catalogue. Here’s a picture of the tags we made at the class.

IMG_8877

As part of the class people purchased the stamp set and six (6) 6×6″ pieces of the Merry Moments DSP. AT class everyone got to make 3 cards and 6 tags using the product they had purchased.

I will be running a class every month where participants buy a specified stamp set as part of the class fee and I will have several projects for them to create at class. The October class is based around the gorgeous Embellished Ornaments stamp set. You can check out details on my creativeJax Facebook Page or on the Up-coming Events tab (HERE) or above. Time is running out to book into this class.

Hop on along to Rebecca Scurr’s  Blog to check out what she has been creating!

Thanks for stopping by and hope you enjoy all the other posts in the hop.

Logo 72ptUntil next time


Jackie


Here are the links to all those Crew participating in this week’s Blog Hop

Julia Quinn

Kathryn Mangelsdorf 

Judy May

Monique Fielder

Rachel Palmieri 

Stasia Sloma 

Emma Palonek 

Alison Barclay

Jackie Noble

Rebecca Scurr

Jessica Williams

CTC Blog


I hope you enjoyed this post,

As always – if you wish to know anything more about  info in this post, or to get a catalogue, or to buy any of the items mentioned in the post, please contact me.

Or you can shop 24/7 at my online Stampin’ Up! shop – just click on any of the products in the table below, and you should find yourself in my online shop at the page with information about the product.

Please do use the hostess code to support creativeJax if you are ordering online!  Entering the Hostess code combines the value of online orders – which assists me to offer events and thank you’s for my customers and support charities such as Ronald MacDonald House and local events where I donate product and/or classes.

The current Hostess Code can be found at the top right of my webpage.

If your order is over $350, please do not use this code as You become the hostess and get the Rewards!

If you would like to find out about joining my Stampin’ Up! Team (thINK Creative) –  Please do get in touch – I would love to chat to you about that.

You can receive my Blog Posts directly by email or join my monthly Newsletter group –  you can subscribe using the buttons at the right of my page. 


Product List
Permanent link to this article: https://creativejax.co.nz/2015/10/stampin-up-ctc50-gift-tags/