Beach Hop Wedding meets Stampin’ Up!

Hello There

I’ve used lots of different Stampin’ Up! products in the projects I am sharing today – a wedding invite, an engagement card and a wedding card & a couple of wedding reception items!

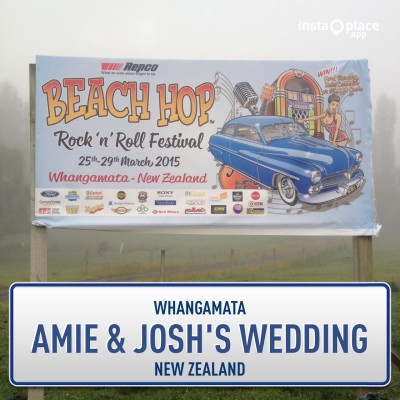
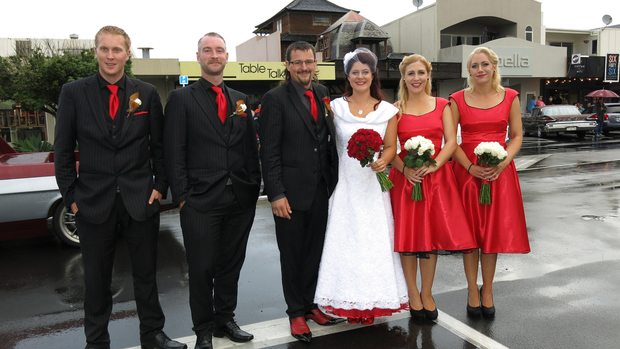
I had the pleasure of attending the wedding of my niece, Amie, and her partner, Josh a couple of weekends ago – so exciting!

Back in October they won a competition and the prize was to get married at The Repco Beach Hop – an annual Rock ‘n’ Roll Festival held in Whangamata every year!  What an amazing prize!

IMG_5960Here’s a picture of the happy couple so you know who I’m talking about!

You can check out the details – including the numerous wonderful sponsors  who helped make this possible – on the Whangamata Wedding Facebook Page’s post in this link:

Amie and Josh wish to say a huge thank you to all the sponsors and everyone behind the scenes that made their day one to truly remember …

Posted by Whangamata Weddings on Wednesday, 1 April 2015

While many items were included, many weren’t so Amie & Josh have worked tirelessly to put together a fabulous day for themselves and their guests – it’s been a frantic few months!

I had the absolute pleasure of helping Amie & Josh with their invitations. The future Bride and Groom put a lot of thought into what they wanted and we got a plan together that saw Real Red, Basic Black and Whisper White combine into an amazing record and sleeve invitation. They designed and printed the graphics to work with the double-record and sleeve concept and then my Cameo Silhouette got a good workout, along with several Stampin’ Up! punches, the trusty Simply Scored scoring board and the Stampin’ Trimmer. The record is a purchased pattern from svgcuts (Rockin and Rollin SVG Kit).

2013_03_27_creativeJax_BeachHop_WeddingInvites2 copy

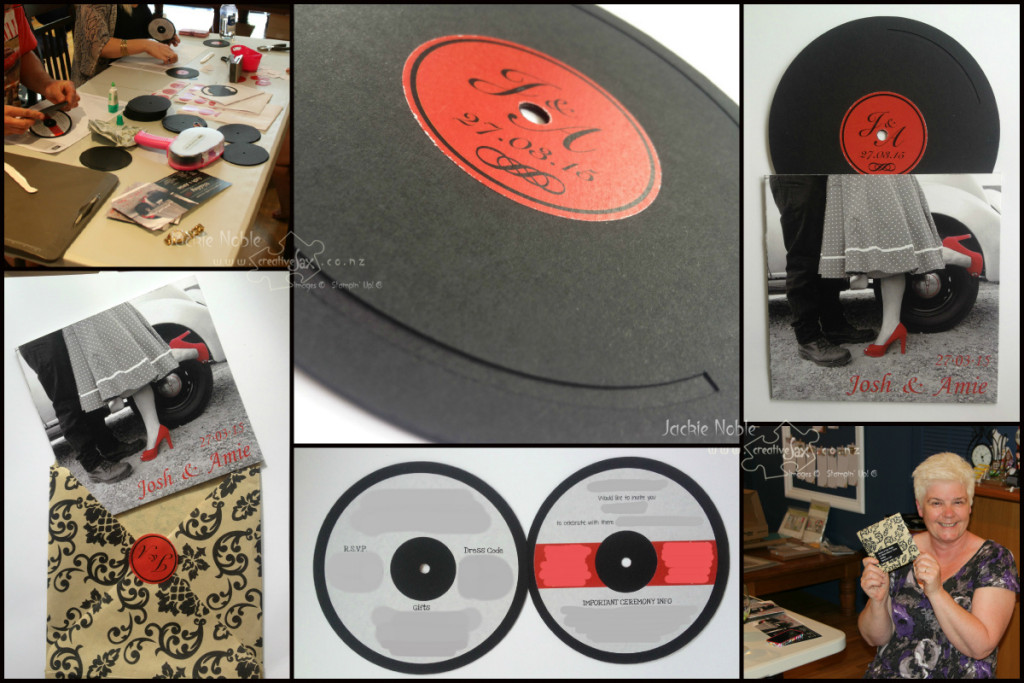
Making the invites up was a fun filled day shared not only with the Bride and Groom but also each of their mothers and a bridesmaid – a great team effort. The MoB and MoG took to the Envelope Punch Boards like ducks to water and made all the envelopes.  Josh was rather taken with all the great Stampin’ Up! tools!  And I got the first invitation – yay!

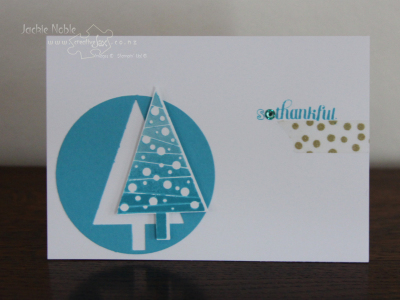
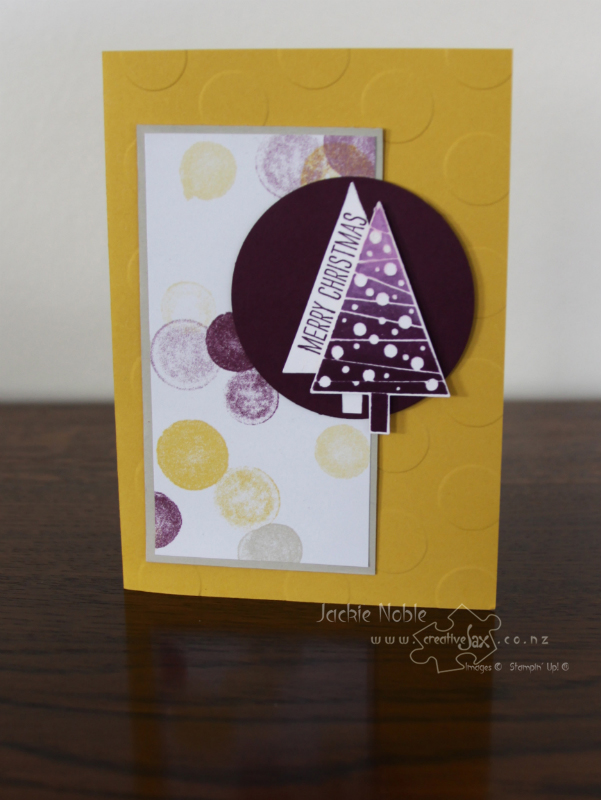
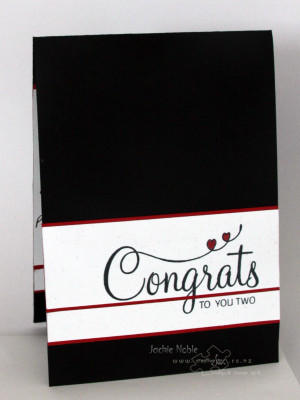
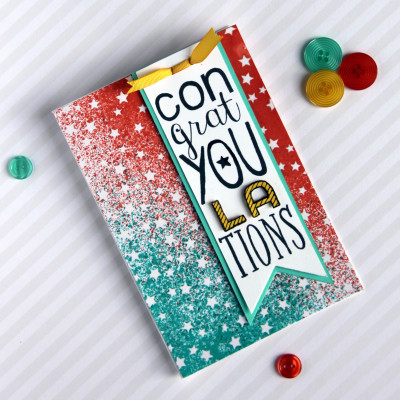
For their engagement card I CASE’d a beautiful card I found on Pinterest by Valerie Moody. I added some Real Red to tie in with the wedding colours.

2015_03_creativeJax_engagement copy

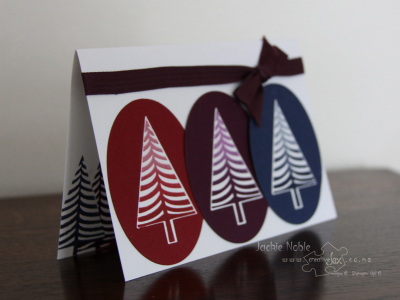
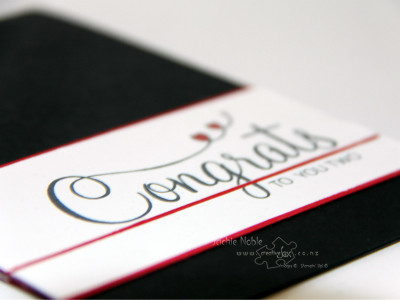
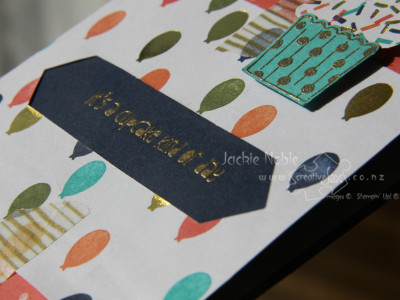
Here’s a close-up. I love the effect of cutting a sentiment and this larger sentiment from the Your Perfect Day stamp set really suits this technique.

2015_03_creativeJax_engagement_closeup copy

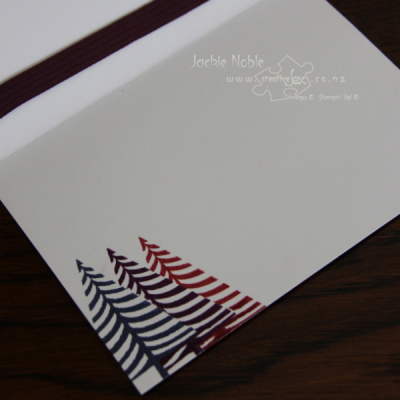
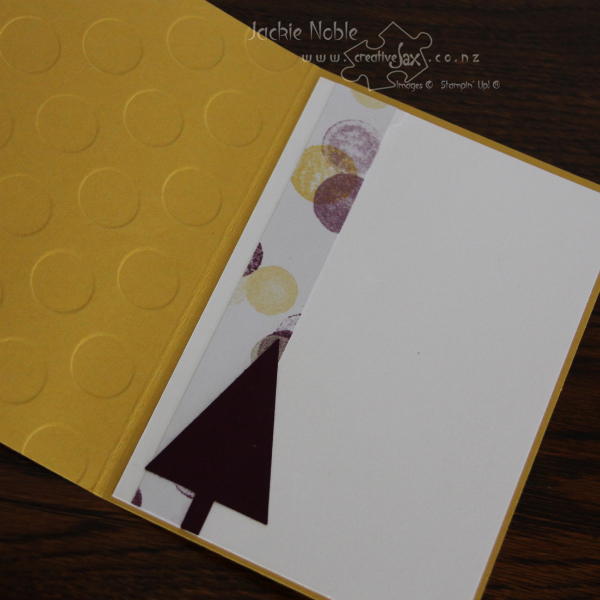
And, as I usually do, I carried the theme through to the inside of the card and onto the envelope.

2015_03_creativejax_engagement_inside copy

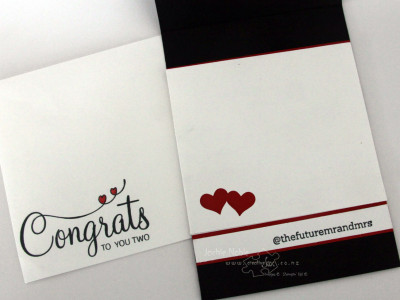
The inside sentiment (@thefuturemrandmrs) from the So Social stamp set was particularly apt for the couple – social media played a part in their winning the wedding competition and will continue to be a part of their day – even after they are married.

For their wedding card I went back to the svgcuts kit. There are some great projects in the kit but it was an easy choice for me to make a jukebox card.

2015_03_27_creativeJax_wedding_card copy

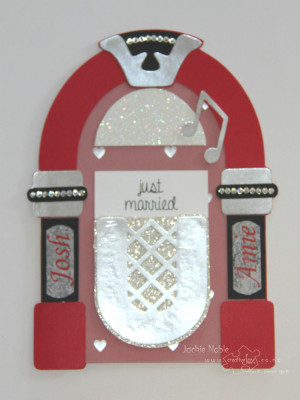
The black, red and white wedding colours were joined by lots of shiny elements – Silver Foil Sheets, Silver Fancy Foil Designer Vellum, Silver Glimmer Paper, Dazzling Diamonds Glimmer Paper and Basic Rhinestones.

2013_03_27_creativeJax_BeachHop_WeddingCard1 copy

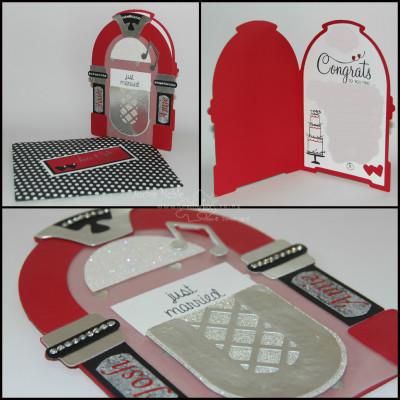
I used the Congrats from the You Perfect Day again – this time on the inside – along with the cute cake from the same set. It’s a bit hard to see, but I used my Stampin’ Write Markers to colour the cake stamp in a mix of black and red – love my markers! The “just married” sentiment was added to be the currently playing song on the jukebox.

Just as I had on their engagement card, I punched two overlapping hearts on the inside of the card with the cute wee sweetheart punch from the Itty Bitty Accent set of punches.

The jukebox card was a non-standard size – but that’s no problem with the trusty Envelope punch Board and some Designer Series Paper (Back to Black DSP). It is so easy to whip up an envelope of any size!

I was really pleased with how this card & envelope came together.

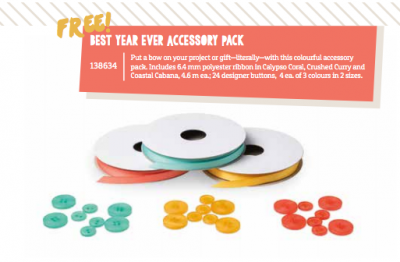
In case you’re wondering – for a gift, we gave the happy couple a Project Life album which I had started for them using the Love Story Card Collection and Accessory Pack along with some Real Red, Basic Black and Whisper White cardstock and the Stacked with Love DSP Stack.  Of course there were a few hearts punched out ready for them to add. I’m looking forward to seeing the album once they have their photos in it.

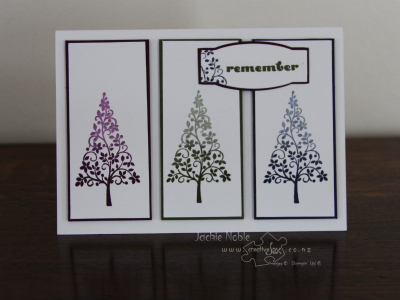
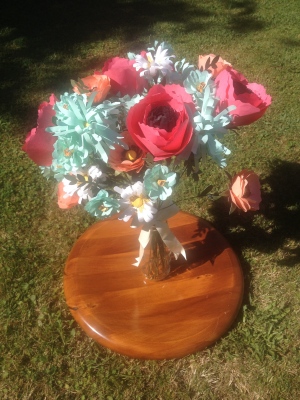
Amie and Josh wanted to have a reminder of the guests so printed out a wedding tree where each guest could leave their finger print. As it is approaching autumn here in New Zealand, they chose some autumn colours for the leaves (Cajun Craze, Pumpkin Pie and Daffodil Delight).

2013_03_27_creativeJax_BeachHop_WeddingReception copy

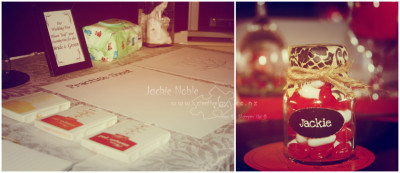
Amie & Josh also made cute lolly jar wedding favours  – with names perfectly sized for an oval punch!

Thought you might like to see one more picture – this one from the Bay of Plenty Times News Paper.

Thanks so much for letting me be part of your day Amie & Josh – it was fabulous.


Logo 72pt

Until next time


Jackie


As always – if you wish to know anything more about info in this post, or to get a catalogue or to buy any of the items mentioned in the post, please contact me.

Or you can shop 24/7 at my online Stampin’ Up! shop – just click on any of the products in the table below, and you should find yourself in my online shop at the page with information about the product.

If you would like to find out about joining my Stampin’ Up! Team (thINK Creative) –  get in touch – I would love to chat to you about that.

You can receive my Blog Posts directly by email or join my monthly Newsletter group –  you can subscribe using the buttons at the right of my page. 


Permanent link to this article: https://creativejax.co.nz/2015/04/beach-hop-wedding-meets-stampin-up/

CASE-ing the Catty #22 – a Stampin’ Up! sketch

Good Thursday Afternoon!

Time for this week’s CASE-ing the Catty (CTC) Challenge

It’s Challenge #22:

“This week we have got an awesome sketch for you which has been CASED from page 17 of the SALE-A-BRATION Catalogue (Link on the side bar). 

The card features a sentiment from the SAB Simply Wonderful Stamp Set and a gorgeous yellow butterfly from theButterflies Thinlits Dies.  However, for our challenge this week you can use any SU products you like and the butterfly and oval can be substituted with other shapes, just as long as we can see that you have stuck to the general layout of the card. “

Here’s my take on the sketch:

2015_03_19_creativeJax_CTC22_cupcake_rect copy


I was rather taken with the gold in the original card this sketch was based on, so decided to incorporate that in my CASE. I love the gold in the Birthday Bash Specialty Designer Series Paper, and once I’d decided to use the two sheets in the set that have gold embossing on them to get the gold into my card – well the rest sort of fell into place. This paper has a really vibrant colour combination and I used several in my card – Night of Navy, Calypso Coral, Bermuda Bay – and of course – gold.

And just in case there is any doubt out there – we also LOVE cupcakes in our house! What’s a birthday (or a class) without a cupcake – right?

So out came the Cupcake Party stamp set and Cupcake Builder Punch, some gold foil and gold embossing powder. The finishing touch was adding a little of the gold washi tape from the Watercolor Wonder washi set.

Here’s a close-up where you can see the gold a little better – unfortunately the photos don’t really show the gold that well.

2015_03_19_creativeJax_CTC22_cupcake copy

One of the framelits from the Project Life Cards and Labels set was used to cut the window in the DSP to see the heat embossed sentiment.

I sure had lots of fun doing this challenge!


Until next timeLogo large


Jackie

p.s.Tonight we’ve got Chocolate cupcakes with mint icing – thanks Beth – my awesome resident baker!

pps – My card was chosen as one of the pictures of the week on NZSU Sites

Week 22 – March 15


As always – if you wish to know anything more about info in this post, or to get a catalogue or to buy any of the items mentioned in the post, please contact me.

If you would like to find out about joining my Stampin’ Up! Team (thINK Creative) –  get in touch – I would love to chat to you about that.

You can receive my Blog Posts directly by email or join my monthly Newsletter group –  you can subscribe using the buttons at the right of my page. 


Permanent link to this article: https://creativejax.co.nz/2015/03/case-ing-the-catty-22-a-stampin-up-sketch/

CASE-ing the Catty #21 – Painted Petals

Well February sure disappeared before I knew it!

What better reason to blog again, than to participate in the CASE-ing the Catty (CTC) Challenge! I love the Stampin’ Up! catalogues and love that CTC is all about CASE-ing the awesome projects that are included in all the catties.

You can check out the CTC Challenge page by clicking on this image.

CASE-ing the Catty Challenge

It’s Challenge #21 and this week the challenge is to ‘CASE’ something from the Every Day section of the Occasions Catalogue (pages 18-33).

You can CASE (copy and share everything) a project and put your own twist on it, or use a sketch/layout, colour combo, embellishment, just to name a few examples, as a springboard for your own creations. 

The design team have provided some super inspiration – check out their projects on the challenge page.

I’ve chosen the frame on page 18 of the Occasions Catalogue as my “springboard”. I’ve drawn a heart around it in the picture so you can see which item I mean 🙂

Occassions Catty Page18


I loved the whole piece of Painted Blooms DSP in the large frame and loved the little flags on the small frame, and then I read the underlined text on the page and the plan for my CASE was hatched!

Here’s the result

2015_03)11_creativejax_CTC21_Painted_Petals_Framecard

The Painted Petal Suite is simply Scrumptious – and that’s hefty praise coming from someone who is not really a flower person – I know – shock horror!

Painted Petals Suite

I just love how this all co-ordinates – of course that’s the intention …  but I can still be impressed … can’t I?


I used the Spring Flowers Embossing Folder to give my frame an ‘aged’ look,  hung my banner on the Painted Blooms Cotton Twine and stamped some flowers from the Painted Petals stamp set on the inside of the card.

2015_03_11_creativejax_CTC21_inside

Did you notice the two colours in my sentiment? I used one of my favourite Stampin’ Up! items to achieve this – my Stampin’ Write Makers. It so easy to colour directly onto the stamp with the Stampin’ Write Markers and get all sorts of cool effects.

I was so happy with how this turned out that I decided to make some more and use them as my thank you cards for those who have ordered with me last month.


2015_03)11_creativejax_CTC21_ThankYou_cards

It’s like a garden of thanks!


Until next timeLogo large


Jackie


As always – if you wish to know anything more about info in this post, or to get a catalogue or to buy any of the items mentioned in the post, please contact me.

If you would like to find out about joining my Stampin’ Up! Team (thINK Creative) –  get in touch – I would love to chat to you about that.

You can receive my Blog Posts directly by email or join my monthly Newsletter group –  you can subscribe using the buttons at the right of my page. 


Permanent link to this article: https://creativejax.co.nz/2015/03/case-ing-the-catty-21-painted-petals/

Top Case at CTC #16 and Pics of the Week at NZSU

A super quick post – I just had to share my very exciting news.

Remember this card which I made for Kathleen to congratulate her on her one year anniversary as a Stampin’ Up! demonstrator? (Check out the post HERE)

2015_01_05_creativejax_CTC16_SAB_DSP_Congrats

Well it won Top Case at CASE-ing the Catty Challenge #16!

Top CASE 2015

Thank you so much – It’s been a rough few weeks and this just made my day!

It was very humbling to be chosen as there were many awesome entries.

My own favourite was the gorgeous card by Elizabeth Gross at Lily Loves Paper – Check it out HERE.

Elizabeth also used the Irresistibly Yours Specialty DSP from the SAB catalogue on her card.

Screen Shot 2015-02-07 at 11.18.46 am

I love how she has stamped onto the DSP – this is a technique I am definitely going to be trying out!

The card was also chosen as one of the pictures of the week at NZSU sites. -Thanks so much!

Week 8 Feb 2015


Until Next TimeLogo 72pt


Jackie


Permanent link to this article: https://creativejax.co.nz/2015/02/top-case-at-ctc-16/

Back at CASE-ing the Catty

With the launch of Sale-A-Bration and the new Occasions Catalogue it’s a busy and exciting time being a Stampin’ Up! Demonstrator – YAY!

I was also really excited to see that the weekly CASE-ing the Catty Challenge (CTC) has started again for the year. There’s such a lot of inspiration in the Stampin’ Up! catalogues – a great place to CASE (Copy And Share Everything) from.

You can check out the CTC Challenge page by clicking on this image.

CASE-ing the Catty Challenge

Unfortunately I missed the first CTC Challenge of the year last week, as I was in having sinus surgery. Ouch! But I’m on the mend now. That’s also why there has been so little action here on my blog, and on Facebook and Pinterest for some time. While I’ve managed to keep on top of the new catty launch, the start of Sale-A-Bration (SAB), some crafting and my monthly classes – not much else has been going on!

So I was really determined to get something blogged in time for CTC #16!

This week’s challenge is as follows:

“Today the challenge is all about NEW DSP.  We want you to be inspired by a project in the Sale-A-BRATION Catalogue (link on side bar) and use some new DSP, or new to you, SU DSP in your project.”

I was inspired by the project at the top of page 14 where the Irresistibly Yours Specialty DSP was spritzed to add colour to the DSP.  This paper is one of the products you can earn for free during SAB. I’ve made some other cards with this paper by sponges and my brayer – but had not done this spritzing technique before so it was lots of fun to try it out.

Screen Shot 2015-02-05 at 6.07.59 pm

I took my colour inspiration from another SAB item you can earn – the Best Year Ever Accessory Pack – the triple double C’s – Calypso Carol, Crushed Curry and Coastal Cabana! An awesome colour combo, and such cool ribbon and buttons too!

Screen Shot 2015-02-05 at 6.07.37 pm

So here’s my card that was inspired by the SAB catalogue:

2015_01_05_creativejax_CTC16_SAB_DSP_Congrats

I had a super exciting reason to make the card too – one of my team members celebrated one year as a Stampin’ Up! demonstrator last week! Congratulations Kathleen – it is great to have you in the thINK Creative Team.

The sentiment came from the Bravo photopolymer stamp set. Aren’t these big greetings useful! And I used the Banners framelits to make the flags – the one with the sentiment on it in Whisper White and the mat in Coastal Cabana. The little ribbon is the Crushed Curry one from the Best Year Ever Accessory Pack and I spritzed in Bermuda Bay and Calypso Coral. The I re-stamped the sentiment, cut out the “LA”, coloured it Crushed Curry with my Stampin’ Write Markers and attached it with dimensionals for extra pop!

I loved the way the two spritzed colours speckled over each other! I’ll be using this technique again!

I do hope you’ve enjoyed my first post for a while – I sure have enjoyed getting back on the keyboard – though it’s time for a nap now 🙂


Until next timeLogo large


Jackie


As always – if you wish to know anything more about info in this post, or to get a catalogue or to buy any of the items mentioned in the post, please contact me.

If you would like to find out about joining my Stampin’ Up! Team (thINK Creative) –  get in touch – I would love to chat to you about that.

You can receive my Blog Posts directly by email or join my monthly Newsletter group –  you can subscribe using the buttons at the right of my page. 


Permanent link to this article: https://creativejax.co.nz/2015/02/back-at-case-ing-the-catty/

SALE-A-BRATION and the Occasions Catalogue are here!

Good Tuesday Morning!

Hope you’ve had a wonderful Christmas and Festive Season.

And hello 2015! – I do hope it is a good year for you!

A quick post to let you know SALE-A-BRATION 2015 has started. And the new Occasions Catalogue has been released.

Sale-A-Bration 2015

Just to remind you – Sale-A-Bration is 3 months of wonderful opportunities to earn free product in 3 different ways – shopping, joining, hosting.

Over the next few posts I’ll share how each of these work as I share some of the cool projects I have been working on which use Sale-A-Bration and new Occasion catalogue products.

You can check out the Sale-A-Bration Brochure and Occasions Catalogue by clicking on the images of their covers below.


You can also view information about the Occasion Catalogue products on my Online Shop HERE

Right back to my craft room now to continue getting ready for my Sale-A-Bration Kick-Off Events tomorrow. Check the details on my Upcoming Events page.

Here’s my bouquet

Build a Bouquet


Until Next TimeLogo 72pt


Jackie

Permanent link to this article: https://creativejax.co.nz/2015/01/sale-a-bration-and-the-occasions-catalogue-are-here/

BNZ Charity Christmas Market

BNZ MarketThe BNZ Wellington Women’s Community is hosting an evening of shopping and festive cheer in the beautiful Atrium space at the BNZ building on Waterloo Quay, transforming it into a Christmas
market.
All funds raised by the organise from Stall-holder registrations and raffles will be going to Victim Support.
Date: Thursday 4 December 2014
Time: 4.30pm – 7.00pm
Place: BNZ Harbour Quays Atrium, 60 Waterloo Quay, Wellington
creativeJax has a stalled booked and we have been busy creating all sorts of Christmas goodies!
So come along and get your handmade Christmas cards, stocking fillers, gift boxes and more.
These are just a sample of boxes that will be available.
2014_12_creativeJax_gift_boxes

Looking for a unique gift for someone special?
… how about a class with creativeJax?
… or a gift voucher for Stampin’ Up! products from creativeJax?
… talk to us about other ideas!

We’d love you to call in and say hi!
victim support logoAbout Victim Support: Victim Support is a free service, which has been offering support for over
30 years to New Zealanders who are victims of serious crime or trauma, no matter the time of day or
location. It is through the dedication of 645 volunteers that Victim Support are able to make a positive
difference to the often shattered lives of both individuals and the wider community, by providing
emotional and practical support, information, financial assistance, referral to other support services
and advocacy for victims’ rights.

Permanent link to this article: https://creativejax.co.nz/2014/12/bnz-charity-christmas-market/

Festival of Trees Bundle – Non Christmas Cards

Hello Again

It’s been a while – hope you haven’t missed me too much 🙂

When I posted for the Creative Inkers Christmas Holiday Blog Hop I mentioned that I had also made some non-Christmas cards with the Festival of Trees bundle and the technique I’d presented at the Stampin’ Up! Party Time in Wellington last month. Today I’ll share those cards.

If you’d like to read about the Ombre Technique using White Craft Ink then check out that post HERE.

Festival of Trees Bundle


Now I LOVE the many ways the Festival of Trees photopolymer stamps and punch can be used to make a huge range of Christmas cards, but it is also good to know these trees and punch can be used to make cards for all sorts of occasions – not just Christmas. So the bundle is a great investment – and an awesome bargain at just $59.25!

The white notecards make a great base for a quick thank you card in Tempting Turquoise. I love how the tree image can be stamped and punched from the inside of a 2 1/2 inch circle – too cute.

2014_10_creativeJax_Ombre_4

I used the “sothankful” sentiment from the Project Life Holiday Cheer stamp set and added a rhinestone that I’d coloured with the Coastal Cabana Blendabilities Markers. I try to think of different ways to use stamps and find the Project Life ones are great for cards as well as for memory keeping. A little splash of gold washi tape (Watercolor Wonder) ties in with the dots on the tree.

Project Life Holiday Cheer Photopolymer

In keeping with the ombre theme, my tri-tree card has two types of ombre happening – the gradient of colour achieved on each tree with the White Craft Ink and also a gradient of colour from Cherry Cobbler, through Blackberry Bliss to Night of Navy.

2014_10_creativeJax_Ombre_1

This time I used my oval framelits to surround a punched tree shape. Next I stamped and punched the tree on Whisper White and then inlaid the punched image into the negative space left in the oval. On the inside of the card I stamped three overlapping trees – masking each image with one of the previously punched tree shapes. You can see the result a bit more clearly in the image below. I rather like the graphic feel of this particular tree image. In fact the range of trees is one of the things I really love about the stamp set.

2014_10_creativeJax_Ombre_1a

A very different tree – the floral image makes a beautiful sympathy card. Again I’ve stamped three images – this time in Blackberry Bliss, Mossy Meadow and Night of Navy. But rather than punch the trees out, for this card I have matted each image on matching cardstock and then used dimensionals to adhere these panels to the card base.

2014_10_creativeJax_Ombre_2

And again I’ve used a Project Life Stamp – this time from the Remember This set. I used my Stampin’ Write marker to colour just the word I wanted rather than the whole sentiment. I’ve cut it out using the Project Life Cards and Labels Framelits.

Project Life Remember This

The last card using the ombre effect I’ve got to share today is somewhat different that the others. One of the very first cards I made using the Tree punch was a paper quilt card that used the triangle shape of the tree (you can see that in my post HERE). As I was making that card, I decided I wanted to experiment with the triangles some more and thought the graphic tree image would be fun to play with.

As it turns out, nine trees can be punched and joined to make a perfect nonagon. Rather than trial and error – I worked this out before I started playing. “How did you do that?” I hear you asking … well I measured the angle of the tip of a tree to calculate if I was going to be able to make a shape with the trees. The tip has an angle of 40 degrees, which divides into 360 degrees exactly 9 times – so – dada – I knew it would work and I knew how many trees to make!

2014_10_creativeJax_Ombre_3

As the tree is so angular – or graphic looking – I chose to make the card in predominantly black and white for extreme contrast. I’ve added a splash of colour in the Bermuda Bay sentiment and the coloured rhinestone. I was really pleased with how this card turned out!

I hope you’ve enjoyed seeing some other things that you can do with the Festival of Trees Stamp Set and Punch. I’d love to see your creations – add a link in the comments below.Logo large

Until next time


Jackie


As always – if you wish to know anything more about info in this post, or to get a catalogue or to buy any of the items mentioned in the post, please contact me.

Or you can shop 24/7 at my online Stampin’ Up! shop – just click on any of the products in the table below, and you should find yourself in my online shop at the page with information about the product.

If you would like to find out about joining my Stampin’ Up! Team (thINK Creative) –  get in touch – I would love to chat to you about that.

You can receive my Blog Posts directly by email or join my monthly Newsletter group –  you can subscribe using the buttons at the right of my page. 


Permanent link to this article: https://creativejax.co.nz/2014/11/festival-of-trees-bundle-non-christmas-cards/

CASE-ing the Catty #12 – Holiday Catalogue Boxes

There is just so much inspiration in the Stampin’ Up! Holiday Catalogue!

I love it!

I’ve been busy making boxes – Curvy Keepsake ones, Box Punch Board ones, faceted ones (tricky!), Tiny Treat ones – you get the idea – lots of boxes!

When I saw the current Case-ing the Catty Challenge for the Holiday Catalogue was Boxes and Bags I was delighted!

CTC_I Play at CTC

I chose the image on page 4 as my inspiration and created some boxes with the Gift Box Punch board using the beautiful, and very sturdy, Under the Trees Specialty DSP. This heavy weight cardstock is fantastic for making boxes with.


Under the trees DSP

After making a few different size boxes, I had some offcuts from the DSP so I got out my Gift Bow Bigz Die and made some bows.

I then added some Gold Metallic Baker’s Twine and some ribbon (Burlap and Whisper White Organza) around a few of the boxes here’s what I ended up with.

2014_creativeJax_CTC12_Gift_box_punchboard

Gift Box Punch Board Creations


Now I just need to work out what to put inside each and many of my Christmas gifts will be sorted!

Check out the awesome projects created by the CTC Design Team on their page HERE.


Until next timeLogo large


Jackie


As always – if you wish to know anything more about info in this post, or to get a catalogue or to buy any of the items mentioned in the post, please contact me.

Or you can shop 24/7 at my online Stampin’ Up! shop – just click on any of the products in the table below, and you should find yourself in my online shop at the page with information about the product.

If you would like to find out about joining my Stampin’ Up! Team (thINK Creative) –  get in touch – I would love to chat to you about that.

You can receive my Blog Posts directly by email or join my monthly Newsletter group –  you can subscribe using the buttons at the right of my page. 


Permanent link to this article: https://creativejax.co.nz/2014/10/case-ing-the-catty-12-holiday-catalogue-boxes/

Creative Inkers Christmas 2014 Blog Hop

 Welcome to the Creative Inkers Christmas Blog Hop

Creative_Inkers_Blog_Header.

Yay – another exciting Blog Hop! All the participants of the hop are part of the Creative Inkers Team of Stampin’ Up! demonstrators and this hop is all about Christmas!

You may be starting the Blog Hop here, or depending on which direction you are heading, you may have come from the creative Narelle Hoggard’s blog or the talented Bev Poultney’s blog. Either way make sure you keep clicking through the list until you end up back where you started. There are lots of wonderful creations to check out.

If you’ve read some of my other posts you will know that I LOVE Christmas! I have created lots of Christmas projects since the Stampin’ Up! Holiday Catalogue was released so there are heaps of things I could share. I did a presentation at the Wellington Stampin’ Up! Party Time Event yesterday (Sat 18th October) so have chosen to share the projects I demonstrated for that – well the Christmas ones!

I was so excited – and a little nervous – to be asked to present a creative WOW project at this fun and informative day held in Wellington. It was hard for me to choose what to use for my WOW – but I narrowed it down to two options – the gorgeous Curvy Keepsake Framelit, or the flexible Festival of Trees photopolymer stamp set and matching Tree punch highlighting a twist on the ombre technique I’ve recently discovered.

Tough choice – but as there are already lots of amazing projects posted about the Curvy Keepsake box I went with Festival of Trees and the ombre effect.


Festival of Trees Bundle

Whisper White Craft Stampin’ Pad – Pigment Ink


I had seen a great Jennifer McGuire video showing how to create an ombre effect using white pigment ink and was keen to try it out with our Whisper White Craft Ink and a photopolymer stamp set. Check out the video for a great How-to description of the technique.

For the WOW presentation I demonstrated the technique using the tree from the Festival of Trees set that has the little circles on it. The technique is show-cased most strongly with images that have a large solid area. Of course it is easiest when you use a photopolymer stamp set as you can see through the image so you can quickly and accurately build up ink layers on the image by repeatedly stamping part of the image. So this stamp from Festival of Trees is ideal. You can also use a rubber stamp – but you will also need the Stamp-a-ma-jig to make sure the partial images are stamped directly on top of the original image until the desired gradient and depth of colour is achieved.

In my presentation I demonstrated the technique with Tempting Turquoise Classic Ink and Whisper White Craft ink, then showed two different cards that could be made with the resulting image.

The first card used the tree image unpunched and matted on Brushed Silver and Tempting Turquoise cardstock with a Brushed Silver card base. The sentiment (from Watercolor Winter Too) was stamped using the Silver Pigment Ink. The cute wee All is Calm Snowflake embellishment is hung from the delicious Silver Satin ribbon.

2014_10_creativejax_Creativeinkers_Blog_Hop_1

Here’s a close-up and the inside of the card …

2014_10_creativejax_Creativeinkers_Blog_Hop_1closeup


2014_10_creativeJax_CreativeInkers_BlogHop_2a


An alternative card using the ombre image is to punch out the tree and use dimensionals to pop it up on onto a rectangle of brushed silver that has had come scoring details added using the Simply Scored board. In this card the ribbon is the gorgeous white organza and the card base is tempting Turquoise.

2014_10_creativeJax_CreativeInkers_BlogHop_2

I also had several other completed samples to show the attendees – all using the white Pigment Ink ombre technique and each using the Festival of Tree bundle in a different way to highlight the versatility of the technique itself and the versatility of the Festival of Trees Bundle. Below are several of the other Christmas cards I shared.


2014_10_creativejax_Creativeinkers_Blog_Hop_5 2014_10_creativeJax_CreativeJax_CreativeInkers_BlogHop_3a

2014_10_creativejax_Creativeinkers_Blog_Hop_3 2014_10_creativeJax_CreativeInkers_BlogHop_4a
 2014_10_creativejax_Creativeinkers_Blog_Hop_42014_10_creativejax_Creativeinkers_Blog_Hop_4b

2014_10_creativejax_Creativeinkers_Blog_Hop_6 2014_10_creativeJax_CreativeInkers_BlogHop_6a

I also had some non-Christmas cards made with this technique – but I’ll save them for a later post.

I do hope you enjoyed seeing my take on The Festival of Trees Bundle and the ombre technique using craft ink. Please feel free to leave a comment below – I’d love to hear your thoughts 😀

Depending on which way you are heading around the hop click on Back to go to Narelle’s post or click on Next to go to Bev’s post. Make sure you head all the way around and check out everyone’s amazing creations.

Thanks for stopping by!

Blog Hop Back Button Blog Hop Next Button


This is the complete list of Blogs in the Creative Inkers Blog Hop

1. Narelle Hoggard

www.handmadebynarelle.wordpress.com

2. Jackie Noble – YOU ARE HERE 🙂
https://creativejax.co.nz

3. Bev Poultney
http://www.stampandscrap.co.nz

4. Sally Williams
http://sallystampingdelights.blogspot.com/

5. Bernice Collins
http://www.stampinup.net/esuite/home/creativeedge/blog

6. Irene Wardlaw
http://www.kowhaihavencrafts.blogspot.co.nz/

7. Sharon de Vos
http://sharonsstampingsnippets.blogspot.co.nz/

8. Jacque Williams
www.stamphappy.co.nz

9. Delys Cram
http://delysc.wordpress.com/

10. Rachael Knight
www.knightstamper.co.nz

11. Lisa Bullock
http://daffyscrapper.wordpress.com

12. Paula Reid
http://yellowbearnz.blogspot.co.nz

13. heather Stewart
http://stampingcraft.co.nz

14. Ria Kaire
http://www.stampinup.net/esuite/home/qraftyqueen/blog

15. Kathryn Tyrrell
http://www.aspotofstamping.co.nz/

16. Kathe Oldham
www.JorjaRose.com

Logo large

Until next time


Jackie


Permanent link to this article: https://creativejax.co.nz/2014/10/creative-inkers-christmas-2014-blog-hop/