Patio Party meets 21st – Decorations

Hello again

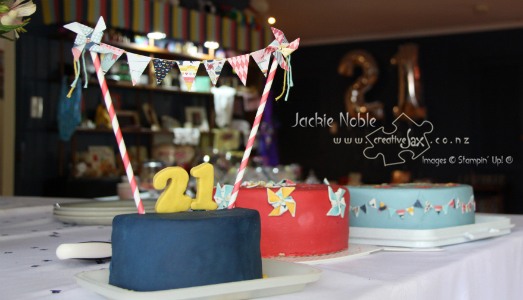
We had Beth’s 21st here at home and had lots of fun planing and making the decorations. and I’m really excited to share how we used  the Patio Party DSP as inspiration for our decorations.


creativeJax - Patio Party meets 21st - Jax and Beth copy

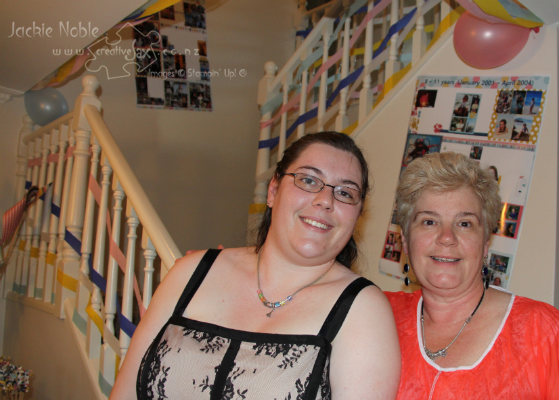
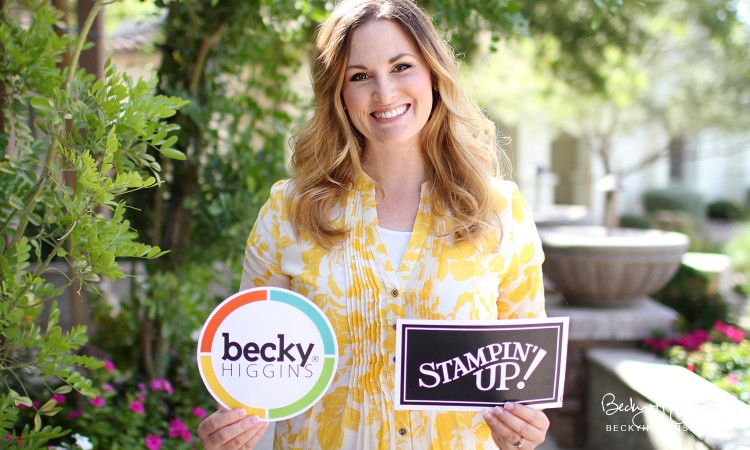
This is Beth and I standing in the hallway with a few things in the back ground.

We’d had the idea for decorations for a long time, so had several months to source items that matched the colour scheme.

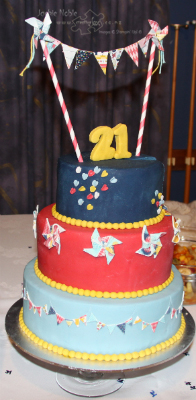
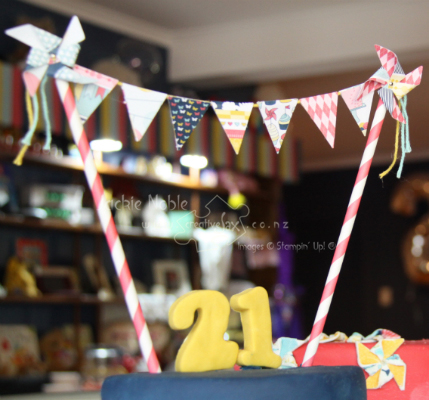
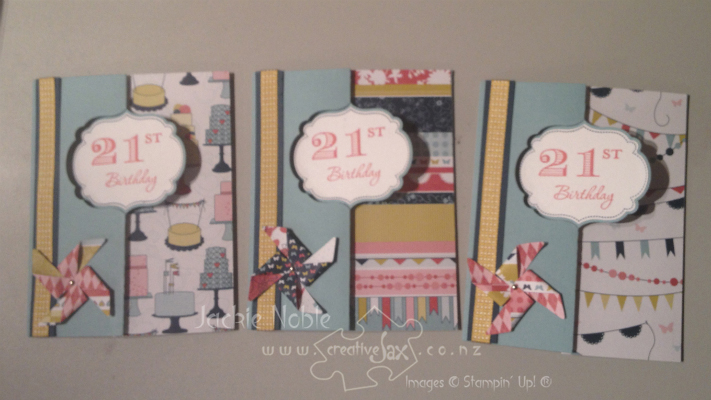
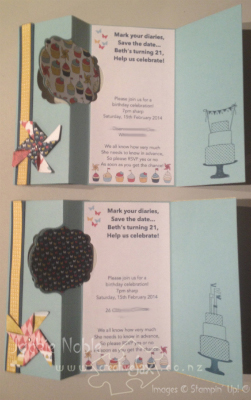
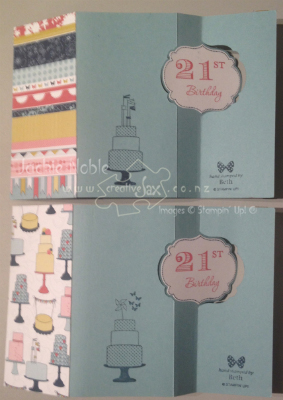
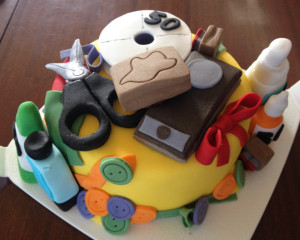
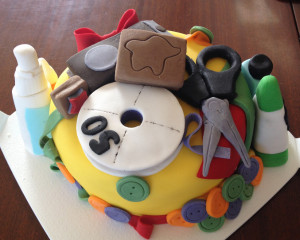
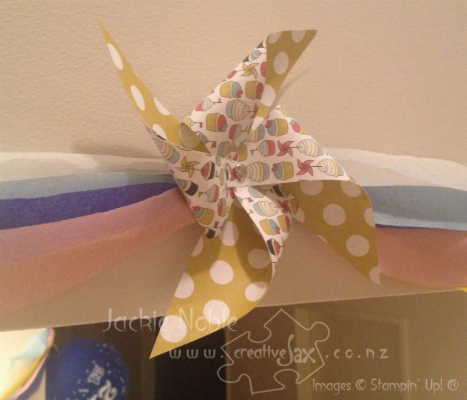
We continued with the pinwheels. As mentioned in my earlier posts (Patio Party Meets 21st – Invitations & – Cake), we had put little pinwheels on the invitations and cake so wanted to carry them through to decorations.

creativeJax - Patio Party meets 21st - Pinwheels and cake copy

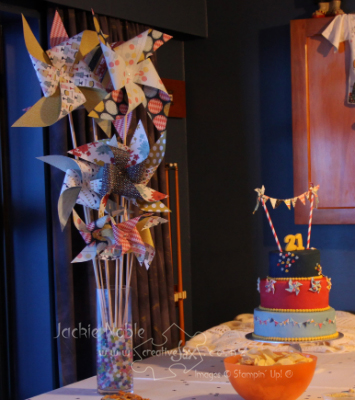
Beth made 3 sizes of Pinwheels to have in vases.

creativeJax - Patio Party meets 21st - pinwheel on candy bar copy
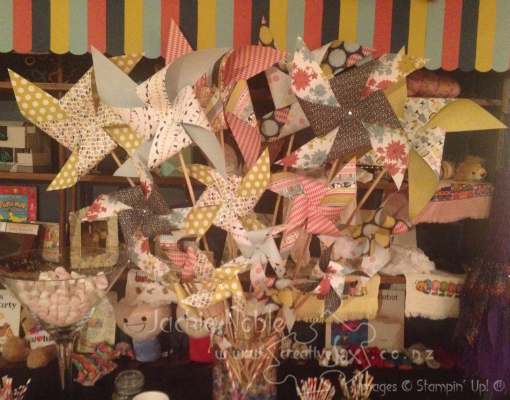
They were made from 12″, 9″ and 6″ squares of DSP and attached to dowelling of different lengths – they looked really cool!

creativeJax - Pool Party meets 21st - pinwheel deco copycreativeJax - Patio Party meets 21st - Hall streamers copy

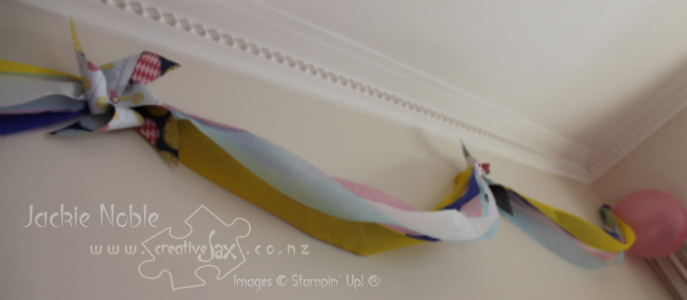
We also put a few up on the walls with the streamers.

creativeJax - Patio Party meets 21st - Pinwheels in Hall copy

There were also cute little small ones to give to each guest as they left at the end of the evening – the mini milk bottles made cute wee vases too!

If you are wondering what the coloured balls are in the vases – they are ‘Gel Balls’ aka ‘Crystal Water Pearls’ or ‘Magic Balls’. They were originally used by florists – especially clear ones which “disappear” in water. They are available in a range of colours and from several outlets online. Oodles of fun – but be warned – they bounce far & wide and are very difficult to pick up if you knock a jar over!

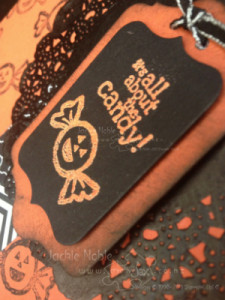
Beth had planned on having a Candy Bar at her party for a long time –  the idea was seeded at an older cousin’s 21st  about 8 years ago!

We placed it in front of a book-case which we filled with childhood memorabilia.

creativeJax - Patio Party meets 21st - Candy Bar complete copy

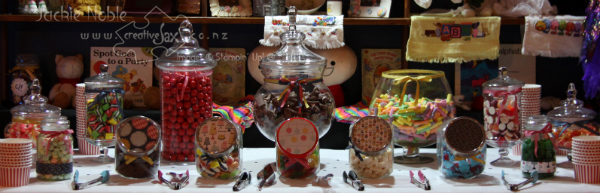
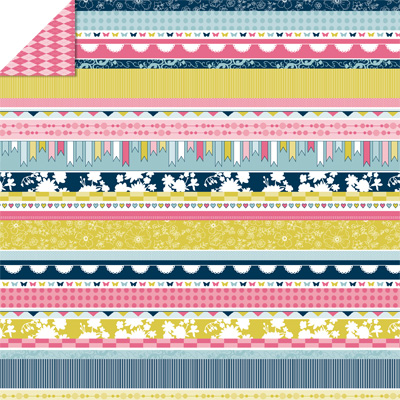
We used card stock to make the top banner of the Candy Bar – retired colour Baja Breeze, and the  2012-2014 In-Colors of Summer Starfruit, Primrose Petals and Midnight Muse.

The strips were curved at one end using the Extra-Large Oval Punch.

We are sure going to miss these colours when they retire at the end of the current catalogue.

creativeJax - Patio Party Meets 21st - Candybar copycreativeJax - Patio Party meets 21st - jar lids copy

The lids of the jars on the Candy Bar had circles of Patio Party DSP that had been cut with the Circle Framelits.

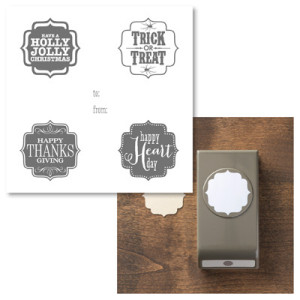
I’d purchased one of the Banner Kits from the last Holiday Catalogue with future birthdays in mind and had lots of fun making it up.

creativejax Patio Party meets 21st Rosettes

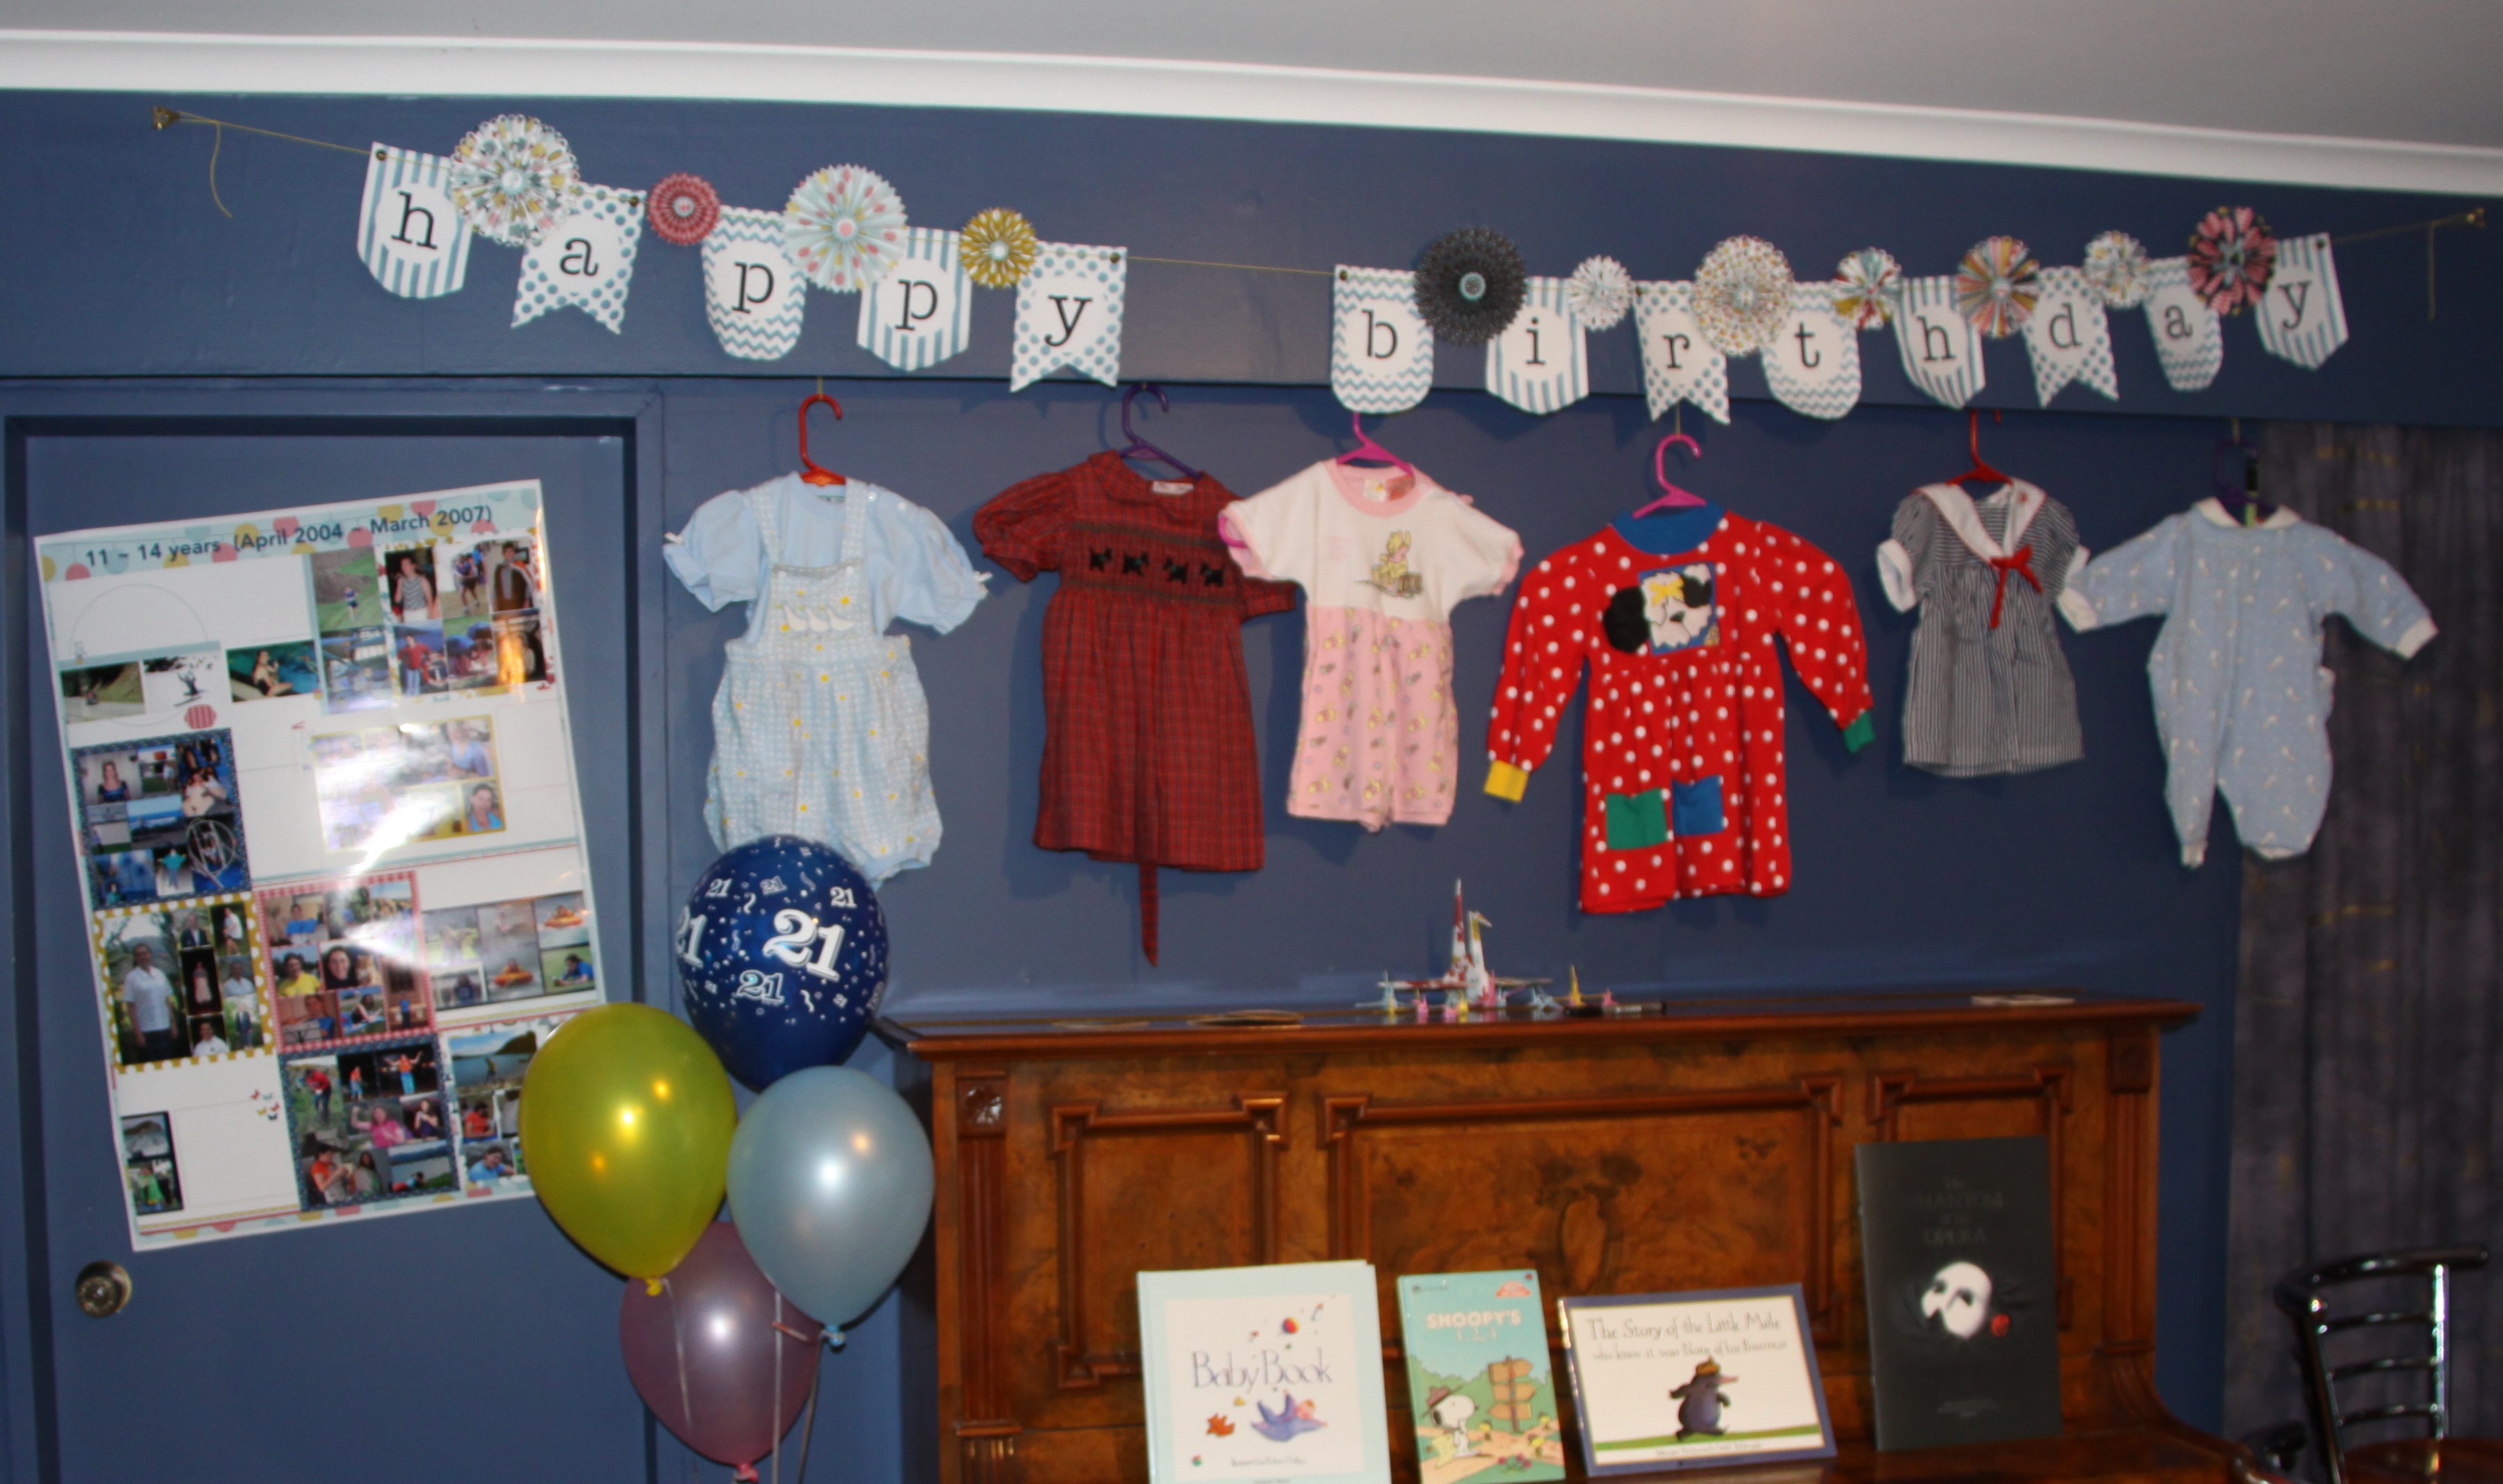
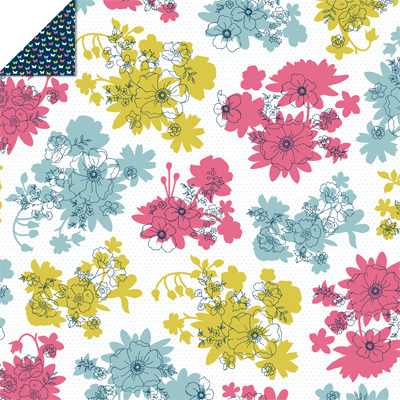
It needed something extra to add a WOW factor though – so out came the trusty Patio Party DSP again!
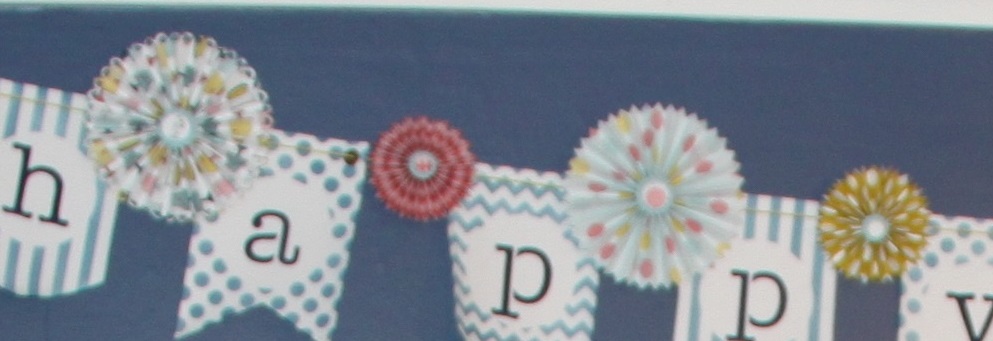
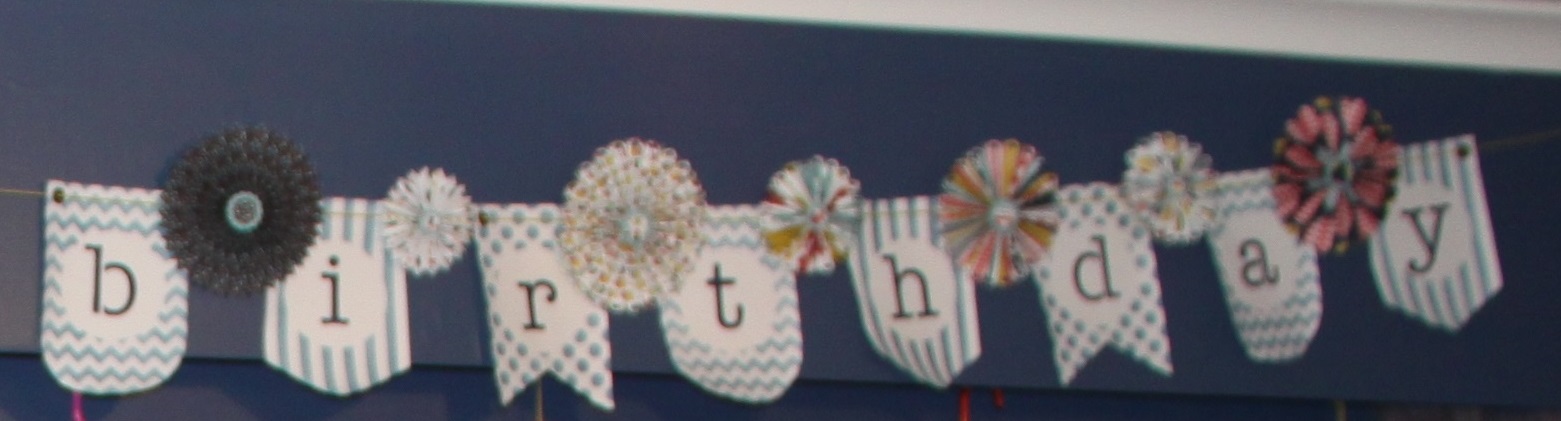
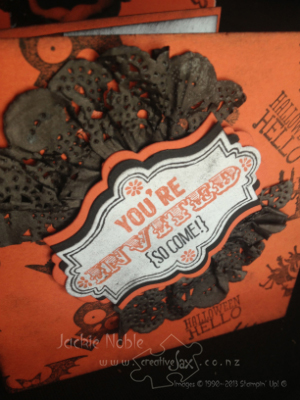
creativejax Patio Party meets 21st Rosettes happy cropped

creativejax Patio Party meets 21st Rosettes birthday cropped

To make Rosettes.

lanterns

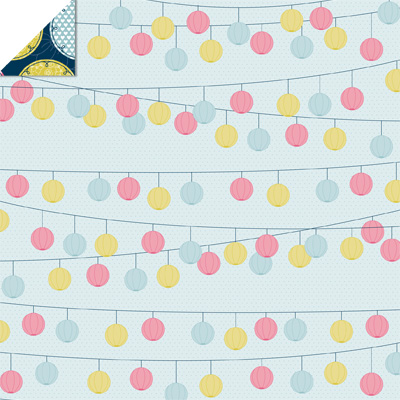
Beth had found some lanterns that were just like these ones in the DSP … but they were white ….

creativeJax - Patio Party meets 21st - lanterns copy

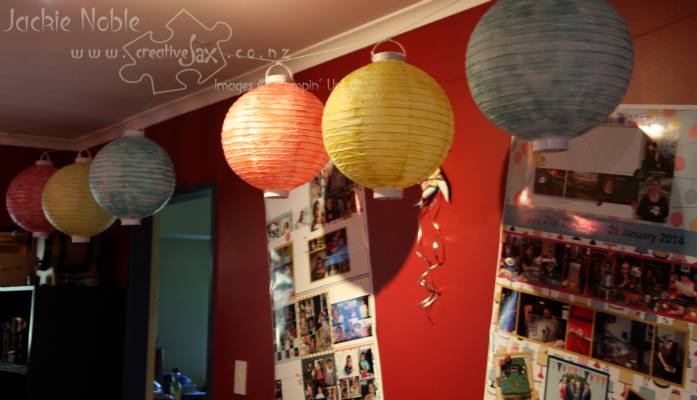
 so they got sponged with re-inker to match the colour scheme.

creativeJax - Patio Party meets 21st - mini milkbottles copy

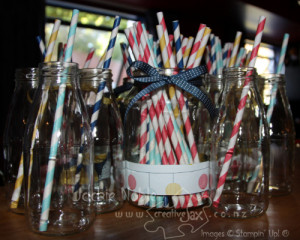
 Ribbon and DSP were used to decorate the vases and jars.

I’ll be missing the Stitched Satin Ribbon when it retires soon too.

You may have noticed the posters in the banner and lantern pictures above – a digital project from MDS which I’ll talk about in the next post.

If you are based in the Wellington area and would like assistance planning your party decorations – I am available to discuss options with you. Contact me by email jackie@creativejax.co.nz

Stampin’ Up! has a wide range of products that are just great to make decorations with.

As always – if you wish to know anything more about, or to buy any of the items mentioned in the post, please contact me. Or you can shop 24/7 at my online Stampin’ Up! shop – just click on any of the product names that are highlighted or in the table, and you should find yourself at the page with information about the product.

Looking forward to sharing how we used those digital products with you.


SUPPLIES:

.Logo 72pt

Jackie


Permanent link to this article: https://creativejax.co.nz/2014/04/patio-party-meets-21st-decorations/

Partners – Stampin’ Up! and Betsy Higgins’ Project Life

Stop Press…

A fantastic announcement from Stampin’ Up! and Project Life …


BH_StampinUpAnnounce_041514_FEATURE-750x450

They are partnering to offer an exclusive range of Project Life product using Stampin’ Up!’s colours,designs and stamps -YAY – way cool.

Check out Shelli & Betsy’s video announcement :

And you can read more about it on the Stampin’ Up! Blog and the Project Life Blog.

I can’t wait to get my hands on these little beauties!

Permanent link to this article: https://creativejax.co.nz/2014/04/partners-stampin-up-and-betsy-higgins-project-life/

Patio Party meets 21st – The Cake

Hello again

Well my week-long series of posts showing how the Patio Party DSP formed the basis for Beth’s 21st party didn’t quite go as planned – i.e. it didn’t go at all after the first one! That trip to North America got in the way along with some technical difficulties – may have had something to do with the person sitting in the chair!

I am now organised to continue the series and, as I said, I hope you enjoy what we did and get some ideas that you can use.

So as a reminder from the last post (Patio Party Meets 21st – The Invitations) images of the 12 DSP paper patterns are below and while they are now retired, they are still available on the Clearance Rack (Patio Party).

lanternsbadgespolka dotscupcakesArgylecollagesummer starfruitcakesbutterfliesflowersheartsbunting

And of course the Make A Cake stamp set which is just so cute and featured on her invitations!

Make a Cake

Beth had a really clear idea of what she wanted her cake to look like based around which elements and colours she wanted incorporated from the Patio Party suite of products.

So we took Beth’s sketches to Becs Lake of Stiletto Studios to make the cake. Beth regular attends classes with Becs and we are always impressed by the magnificent and individualised creations she makes for people – and she didn’t disappoint us! Thanks so much Becs we know there were one or two challenges!

So … the cake … Dada …

creativeJax - Patio Party meets 21st - Cake copy

It was just gorgeous!

As well as giving Becs some card stock and Patio Party DSP for the colours, we also supplied her with the digital file for the DSP from MDS (My Digital Studio) which she used to make the pinwheels and bunting around the bottom layer of cake. We used MDS for several items – you’ll get to see more digitally made items in a future post.

Beth made the bunting for the cake topper from paper DSP.

creativeJax - Patio Party meets 21st - cake topper copy

 We had to deconstruct a little to cut the cake.

creativeJax - Patio Party meets 21st - Cake Deconstructed


And each layer was a different flavour – Strawberry & White Chocolate, Passionfruit & White Chocolate & Dairy Milk Mud Cake – guess who likes chocolate! It was delicious – nomnom!

CreativeJax - Patio Party Meets 21st - Cake Cut

Thanks again Becs for a cake that so beautifully meet our brief – looked great, fitted in so well with the party’s theme and tasted fantastic too.

Check out Stiletto Studio’s webpage here (www.stilettostudio.co.nz) or the Facebook page here

As always – if you wish to buy any of the items mentioned in the post, please contact me or you can order at my online Stampin’ Up! shop – just click on any of the product names that are highlighted and you should find yourself at the page with information about the product.

Looking forward to sharing some of our decoration ideas with you next.Logo 72pt

Until next time


Jackie


Permanent link to this article: https://creativejax.co.nz/2014/04/patio-party-meets-21st-cake/

Patio Party meets 21st – The Invitations


creativeJax - Patio Party meets 21st - Book-002

This weekend we got to celebrate our daughter Beth’s 21st Birthday.

Traditionally the 21st has always been the “big” birthday here in New Zealand and while it no longer holds the same place as the age of passage into adulthood, the party tradition continues.

When we first talked seriously about having a party for her 21st about a year ago, Beth asked if the party could be themed around a Stampin’ Up! DSP (Designer Series Paper) that she had fallen in love with – Patio Party. Of course I agreed – great choice and so many options!

This is the first in a week-long series of posts showing how the this DSP formed the basis for the party. I hope you enjoy what we did and get some ideas that you can use.

The 12 paper patterns are below – Beth makes cupcakes and does cake decorating as an interest, so the papers were so appropriate for her. She also loves pinwheels and lanterns and blue is her favourite colour, so this set really was a dream come true for her.

lanternsbadgespolka dotscupcakesArgylecollagesummer starfruitcakesbutterfliesflowersheartsbunting

As the paper was in last year’s catalogue we stocked up on it before the catalogue finished. Of note this paper is currently available on the Clearance Rack (Patio Party) so if you’re inspired to use it is still currently available – yay!

The colours in the paper are Midnight Muse, Summer Starfruit, Primrose Petal, Whisper White and Baja Breeze. With Baja Breeze retiring we made sure we had plenty of that too! Of course one of the great things about MDS is that colours don’t retire and digital files are available long after they have retired. As well as hard copy, we made good use of the digital files associated with Patio Party too.

Beth made her invitations using the Label Card Thinlits, with the front having Baja Breeze & Midnight Muse card stock , Patio Party DSP, mini silver brads, Summer Starfruit Stitched Satin Ribbon and the Memorable Moments Stamp set.

creativeJax - Patio Party meets 21st - invitation 1 copy

She made the insert in MDS and used the Make A Cake stamp set on the inside and back of the card. She also stamped her envelope with the cake so that everyone got to see all three cakes – each with a different topper option.

creativeJax - Patio Party meets 21st - invitaion 2 copy creativeJax - Patio Party meets 21st - inviation 3 copy

The Make A Cake stamp  set is just so cute – I can see why Beth loves it!

Make a Cake


These images inspired her actual party cake – more detail in a later post.

As always – if you wish to buy any of the items mentioned in the post, please contact me or you can order at my online Stampin’ Up! shop – just click on any of the highlighted text and you should find yourself at the page with information about the product.

Looking forward to sharing some of our decoration ideas with you next.Logo 72pt

Until next time


Jackie


Permanent link to this article: https://creativejax.co.nz/2014/02/patio-party-meets-21st-the-invitations/

The Big Five-Oh!

Well I recently reached that significant milestone – 50! WERHOO!!!

creativejax_50th_cake0

I just had to share with you some photos of the cake my very talented daughter made for me – so appropriately themed don’t you think!

creativejax_50th_cake

How many Stampin’ Up! products do you recognise?

creativejax_50th_cake5creativejax_50th_cake4

creativejax_50th_cake3creativejax_50th_cake6

Not only is Beth a talented cake decorator – she is a great baker. The lemon cake inside was delicious too!

It’s in her DNA as she comes form a long line of bakers – many of whom bake(d) delicious treats in their home kitchens – but also a series of bakers who have worked in the family bakery (Oslers Bakery Ltd, Wairoa) for over a hundred years including an uncle, a grandfather, a great grandfather, a great great grandfather along with numerous extended family members.

Until next time

Logo little

Permanent link to this article: https://creativejax.co.nz/2014/02/the-big-five-oh/

Birthday Cheer

Hi there – it’s been a while!

December zipped by before I knew it and now January is more than half over too! I have had lots on and made a few things I’ve been meaning to share here on my blog. Note to self – post more regularly!

So first up, my niece had a birthday on Tuesday last week – she also got married on Friday but that post is for another day 🙂

She is such a bubbly, cheery person I knew just the stamp set that would be awesome for her card – “Happy Hour”!

Cheers Birthday Card

And of course I used colours from the brights collection – well mostly – the card base is Crushed Curry. But it goes so well with Mambo Melon and Bermuda Bay.

Each glass has its own “something special” which you can see in the close-up.

2014_01_creativeJax_Happy_Hour_BdayCard_Closeup

And the sparkle came with some rhinestones and Crystal Effects.

You can get all the supplies used at my Stampin’ Up! Online Shop – start shopping here.

Logo 72pt

Until next time

Permanent link to this article: https://creativejax.co.nz/2014/01/birthday-cheer/

Markets

Beth and I had fun weekend at the Underground Market a couple of weekends ago and we are looking forward to going to the Pataka Market tomorrow.

Underground-market-at-Pataka-every-3rd-Sunday

Below are a couple of photos of our stall at the Underground Market in Wellington. We changed the layout on each of the days.

IMG_4830 IMG_4837

We have crackers, cards and tags that match:

IMG_2486

Also a few novelty items – great for stocking fillers:

IMG_4832

IMG_2435


And here are some of the cards we have for sale:

IMG_4626

IMG_4622

IMG_4625

IMG_4621


IMG_4615

2013_Nov_Xmas Class3 Cards copy


2013_Oct_CHristmas_Class_1_Evergreen copy

IMG_4611

IMG_4620


2013_Oct_Christmas_Class_1_Merry_Little_Christmas copy


Along with many other Christmas and a few non-Christmas cards as well.

It would be great to see you so call on by and say Hi!

Check out more about the Underground Markets – including the Pataka Market here

Logo 72pt

Until next time


Permanent link to this article: https://creativejax.co.nz/2013/12/markets/

“Color Me Christmas”

After a busy and fun week of classes, I headed to Hawkes Bay to see my Dad (Walt) over the Labour long weekend.

The last weekend in October is “Labour Weekend” in New Zealand, with the Monday (Labour Day) being a Public Holiday. Labour Day commemorates the struggle for an eight-hour working day. New Zealand workers were among the first in the world to claim this right when, in 1840, the carpenter Samuel Parnell won an eight-hour working day in Wellington. Labour Day was first celebrated in New Zealand on 28 October 1890. Now it is often the weekend when people start thinking about summer and getting their gardens and yards tidied for the upcoming season.

For my family, Labour weekend also falls around the time of Dad’s birthday. On Friday I drove the 400km from Wellington to Wairoa to celebrate with Walt, my 2 brothers and 2 sisters, my sister-in-law, and some of the grandchildren. What a wonderful evening we had together sharing food and each others’ company, though we keenly felt the absence of Mum who sadly passed away earlier this year.

Beth was studying for University Exams so didn’t make the trip with me – but she did make some gingerbread cupcakes for Walt.

2013_Walts_Birthday_Cupcakes

One of the things we have often done over Labour Weekend is have a bonfire or two. Great to clean up the fallen branches and tree prunings before the inevitable summer fire-ban is in place. Mum (Jude) always loved a good bonfire and she would have enjoyed the two we had on Saturday. No doubt she would have made banana-chocolate- marshmallow parcels to go in the embers – for the grandchildren of course.

IMG_2296IMG_2282

Christmas was Jude’s favourite time of the year. She was often referred to as Mother Christmas, and truly celebrated the season. She would be loving all the Christmas cards and crafts I am making, and that I have had a Christmas tree up since the end of August! The stamp set I am sharing today is one I am sure Jude would have enjoyed – I know I am.

The “Color Me Christmas” set has five gorgeous stamps that are just so cute. (I just have to put the name in quotation marks – the spelling nerd in me finds it difficult as we spell it “Colour” here in New Zealand.)

2013_09_29_Color_Me_Christmas_resized

Don’t you think this reindeer looks great in any colour combination?

I CASED the card below from the Stampin’ Up! Holiday catalogue (pg 38) but made a few adjustments including using different stamp sets.

2013_ColorMeChristmas_WishingYou

___________________________

Ink: Bermuda Bay (131171), Island Indigo (126986)  
Stamps: Color Me Christmas (Wood 131772, Clear Mount 131775), Wishing You (Wood 131748, Clear Mount 131751) Card/Paper:  Whisper White (106549), Winter Frost Specialty DSP (132341)  
Accessories: Dimensionals (104430), Stampin’ Write Markers – Many Marvelous Markers (131264)  
Tools: Stampin’ Distress Tool (127562)

___________________________

The foil sheets in the Winter Frost Specialty DSP are almost too good to cut – but well worth including in a project if you can bring yourself to use a piece – trust me the first cut is the hardest! You don’t need much for it to make a real impact so it goes a long way. I just had to embellish the bow on the stamped image with this sumptuous foil paper.

2013_Color_Me_Christmas_Present_closeup_resized

I made the cute gift tags below using the “Color Me Christmas” stamp set when it first arrived. I displayed them at my Holiday Catalogue Open House and then they’ve lived in my “Create Frame” which always hangs on the wall in the room where I run my classes – aka our entertainment room that I take-over several times a month)

2013_Nov_XMas_Class4_Tags2 copy

I’ve been asked several times if I would do these tags at one of my classes – so have scheduled them for late November. You can check out the details for my classes on the Up-Coming Events Page or book online at my Stampin’ Up! website.

Logo 72pt

I hope you enjoy this cute little stamp set as much as I do.

Until next time

Jackie

Permanent link to this article: https://creativejax.co.nz/2013/11/color-me-christmas/

Halloween Hello

Maybe it’s a hangover from our time living in Canada – but I really do like the Halloween hype and sort of miss it here in New Zealand. Halloween is not an event/holiday that is really celebrated in New Zealand and even though trick-or-treat’ing happens a bit, it isn’t anything like what we experienced in Regina, Canada.

So even though they may not actually get used for their intended purpose – I couldn’t resist getting something in the Halloween line and went with a set of wood mounted “Halloween Hello”. It is also available in clear-mount.

Halloween_Hello_131718L

There’s 9 stamps in the set, and I decided that as I would definitely be able get non-Halloween use out of several of the stamps at a later date, it would be a cool little set to have.

Of course I had to made a few Halloween samples for our Open Day!

2013_09_29_Halloween_items_resized

The bag would be great for trick-or-treating – hmmm maybe I might have to find a small child to give it to.

2013_09_29_Halloween_TagBag_closeup_resized

The tag centred on the front was made using the Chalktalk Framelits and a Paper Doilie that has been coloured with Basic Black ink by sponging. Class attendees – you may recognise these from when we made our butterfly card – a great recycling use I thought! The stamping is heat embossed in Tangerine Tango Stampin’ EmbossTM Powder

2013_09_29_Halloween_Bag_Tag_Closeup_resized

The tag hanging from the handle (TRICK or TREAT) comes from the Tags 4 You stamp set and punched out with the Label Bracket Punch. This is another great pair available at a discounted bundle price when purchased together.

Tags Bundle

And you need treats for Halloween!

2013_09_29_Helloween_Hello_resized

The toppers on the tall candy were made using the Labels Bracket punch – I folder some Tangerine Tango DSP from the Brights Designer DSP in half before punching – great size for a topper. The other favour was made using the Goodie Gear Simply created Kit and the Oh, Goodie Stamp Set.

2013_09_29_Halloween_card_closeup_resized

The card is an invitation – though we have decided we can’t squeeze a Halloween Party into our schedule this year. You can see another one of those recycled Paper Doilies made its way onto this card. The sentiment is from the Sketched Birthday Stamp set and is teamed up with the Apothecary accents Framelits – don’t you love how versatile Stampin’ Up!’s stamps are. Add the right colours and a bit of grunge and this stamp is great for a Halloween invitation.

Now – off to think about who I can give the Trick or Treat bag to. I think the treats have been claimed in-house!

Logo 72pt

Until next time

Jackie

Permanent link to this article: https://creativejax.co.nz/2013/10/halloween-hello/

Pop-Up Present Card Photo Tutorial

Hi Again

What a great weekend I’ve had.

Roy, Beth and I flew up to Auckland early on Saturday and met my sister Julie so that we could head to see Wicked! The Musical on Sunday.

This was Julie and I having a small appropriately themed snack before the show – nom nom!

2013_10_12_Wicked

I was so lucky that the weekend coincided with a “Team Training” with Jacque Williams – head of the Creative Inkers Stampin’ Up! Team  (Jacque’s Stamp Happy webpage is HERE). Just one of the great things about being a Stampin’ Up! demonstrator is the support from others in the team and I am fortunate to be part of Jacque’s Creative Inkers team.

Jacque, like other demonstrators, holds regular team trainings and one of the neat things we demonstrators can do at trainings is participate in a “Swap”.  A swap is where each person makes a card (usually with an agreed theme) that they can swap with another demonstrator. Signing up for a swap is completely optional but is a great way to share ideas and get samples using stamp sets and other products we may not have ourselves.

2013_Oct_Christmas_Class_1_Merry_Little_Christmas copy2013_Oct_Christmas_Class_1_Merry_Little_Christmas_Closeup copy

At Saturday’s training 11 of those present had signed up by the cutoff date (about a week before to give us time to make the cards) so we each made 11 cards that we could swap. We came home with 11 different cards (1 of our own and 10 others). As my swap, I made the pop-up present card I had done in class last week. While I’ve made the pop-up as a Christmas present – it can easily be made as a birthday card or as a wedding card  – the pop-up could be a present or and cake!

I had several questions about how the pop was put together and how the ribbon is done so I decided to do a photo tutorial – another first for me. Hope you have fun trying out this fun card.

You can see the Card Recipe with card-stock dimensions and a template of the cutting/scoring of the card inner HERE.

2013_popup_present_tutorial_1to3

In photo 6 below, you will see the DSP on the inside of the card. I found it easiest to attach this before attaching the ribbon.

2013_popup_present_tutorial_4to6


2013_popup_present_tutorial_7to9

2013_popup_present_tutorial_10to14

2013_popup_present_tutorial_15to19

2013_popup_present_tutorial_20to23

Well there it is – my first photo tutorial.

I do hope you find it useful and if you make a card using these instructions, post a picture and let me know where  – I’d love to see your creation.

Logo 72pt

Until next time


Jackie

Permanent link to this article: https://creativejax.co.nz/2013/10/pop-up-present-card-photo-tutorial/